(Not Really) Home Cooking

Friday, January 23, 2009

Let's face it: There is really nothing better than a "homemade" meal that you don't have to actually make. Especially on weeknights, after a long day at work.

This post is a tribute to the people at The Ravioli Shop, who essentially are responsible for making my dinner when I don't feel like it.

These geniuses have opened a shop that sells--well, you guessed it--ravioli. Fresh ravioli, made daily, with many different fillings. Sausage, four cheese, shrimp, lobster, feta, asparagus, etc. Our favorites are pumpkin, roasted vegetable, and roasted red pepper.

The shop is charming and small. When you walk in, you're always greeted, and the worker usually asks whether you've been there before. If not, they give you a little "tour" of the different products and even make recommendations.

There are refrigerated ravioli if you're planning to cook it up that night, and there are frozen ones if you're planning to store it for later.

Once you finally make your ravioli decision (it's difficult sometimes!), you also have the opportunity to pick up sauce, if you so choose. They also stock a small supply of organic mixed greens, as well as a few kinds of freshly baked bread (including semolina bread, which is awesome).

Once home, all that has to be done is to boil a pot of water. Throw in the ravioli, and in 8 to 11 minutes (depending on whether the ravioli is frozen), you have a perfectly cooked meal.

With our pumpkin ravioli, all we ever do is toss it in a little bit of olive oil. With the roasted vegetable and roasted red pepper varieties, we usually top them with a little bit of tomato sauce.

But no matter what the sauce, one thing is always a necessity: Parmesan cheese.

So, so good. It's hot, it's tasty, and it's easy. All thanks to The Ravioli Shop. And you know what? It's popular.

And so I figure... There is only one thing to ask.

Why didn't I think of this??

Read more...

Chicken and Summer Vegetable Tostadas with Mexican Rice

Thursday, January 22, 2009

This is a newbie for us. I was in the mood for something different for dinner one night this week, so I went perusing the internet for ideas.

I came across this recipe on Cooking Light, and since it sounded really good, I decided to go with it. I wanted to pair it with something else, so I then went on a hunt for a mexican rice recipe. I couldn't find exactly what I was looking for, so I used a couple different recipes as a foundation and added my own twists.

Both turned out awesome. Leftovers were fantastic, too.

Chicken and Summer Vegetable Tostadas
(Source: Cooking Light)

Ingredients:
- 1 teaspoon ground cumin
- 1/4 teaspoon salt
- 1/4 teaspoon black pepper
- 2 teaspoons canola oil
- 12 oz. boneless, skinless chicken breasts, cut into really small chunks
- 1 cup chopped red onion (about 1) (we used a mayan onion)
- 1 cup fresh corn kernels (about 2 ears) (due to the winter, we used canned corn)
- 1 cup chopped zucchini (about 4 ounces)
- 1/2 cup green salsa (we substituted regular red salsa)
- 3 tablespoons chopped fresh cilantro, divided (we used dried cilantro)
- 4 (8-inch) fat-free flour tortillas
- Cooking spray
- 1 cup (4 ounces) shredded Monterey Jack cheese (we used a pre-shredded "Mexican" mix)

Directions:
1. Preheat broiler.

2. Combine first 3 ingredients, stirring well. Heat oil in a large nonstick skillet over medium-high heat. Sprinkle the spice mixture evenly over chicken. Add chicken to pan; sauté for 3 minutes.

3. Add onion, corn, and zucchini to pan; sauté for 2 minutes or until chicken is done. Stir in salsa and 2 tablespoons cilantro. Cook 2 minutes or until liquid almost evaporates, stirring frequently.

4. Working with 2 tortillas at a time, arrange tortillas in a single layer on a baking sheet; lightly coat tortillas with cooking spray. Broil 3 minutes or until lightly browned. (Ours took much less than three minutes. Also, going from some suggestions in the comments section on Cooking Light, after they browned on the first side, we took them out of the oven, turned them over, sprayed with more cooking spray, and put them back under the broiler to brown the other side as well. This made the tostadas nice and crispy, and they held up well to the weight of the ingredients on top of them.)

5. Spoon about 3/4 cup chicken mixture in the center of each tortilla; sprinkle each serving with 1/4 cup cheese. Broil an additional 2 minutes or until cheese melts. Repeat procedure with remaining tortillas, chicken mixture, and cheese. Sprinkle each serving with about 3/4 teaspoon of remaining cilantro. Serve immediately.

Mexican Rice
(Source: Adapted from Southern Living)

Ingredients:
- 1 1/4 cups long-grain rice
- 1 tbsp. vegetable oil
- 1/4 - 1/2 cup chopped onion
- 2 garlic cloves, minced
- 1 (14 oz.) can chicken broth
- 1 (8 oz.) can tomato sauce
- 5 oz. water
- 1/2 tsp. salt
- 1/4 tsp. pepper
- 1/2 tbsp. chili powder
- 1 tsp. ground cumin
- 2 tsp. dried cilantro (optional)

Directions:
1. Saute rice in hot oil in a skillet over medium-high heat for three minutes or until lightly browned.

2. Add onion and garlic, and saute two minutes.

3. Stir in broth, tomato sauce, water, salt, pepper, chili powder, cumin, and cilantro. Cover, reduce heat, and cook until tender (about 15-25 minutes).

4. Remove from heat, and let stand 5 minutes. Fluff rice with fork.

Read more...

Seven Months

Wednesday, January 21, 2009

I went through a good portion of the day thinking to myself, "January 21. January 21... why do I feel like something happens on January 21?"

As it turns out, nothing happens on January 21, but the "21" will probably always sound familiar to me.

Why? Well, because of June 21, of course.

Seven months now! Well on our way to the one-year mark.

And speaking of the one-year mark... Tonight, we booked our flight for our first anniversary trip. We're going to Seattle and San Francisco!

I was born in Seattle, but only lived there until I was 6 years old. I've been back a few times, but Michael has never been. It's been on our "list" for a while, so we figured we'd jump at the opportunity to go all of the way out there while we have the chance.

Neither of us have been to San Francisco, and we've always wanted to go, so hey--if we're going all the way across the country, we might as well take advantage of it and visit two cities instead of one.

So we're going to be spending about 5 days in Seattle, and then another 5 in San Francisco. Fun, fun! We're hoping the weather will be kind to us and it'll be beautiful for mid-June. Can't wait!

Meanwhile, we still have four more "mini anniversaries" until we hit the real one. But with the way things have been going, those will all fly by before we know it. Isn't that just the way life works?

Read more...

Mr. President

Tuesday, January 20, 2009

Today is an awesome day.


I have never experienced an inauguration the way it is meant to be experienced. I was only 10 years old when Bill Clinton was sworn into office, and although I have very clear memories of watching it (I was home from school and spending the day at my grandma's), I was too young to understand the magnitude of it.

And in January 2001, when George W. Bush was inaugurated, I was still disgusted over the controversial results of the election. As wrong as it may be, I just didn't care.

Today, I was moved to tears (for the first, but not the last time), not by Obama walking out of the tunnel, but instead by a shot of the crowd cheering wildly and waving all of their flags.

I love America.

And today, I watched as the man that I believe in--Barack Hussein Obama--was sworn in as the 44th President of the United States of America. I have been rooting for him, supporting him, and getting to know him for two years. And on Election Night, our country spoke out in his favor. And finally, now, it is official. If I hadn't just watched it with my own eyes, I may not even believe it. In a lot of ways, it seems surreal.

Now begins the true test. To see what President Obama can do for this country. He is definitely receiving the country in worse shape than it has been in a long time, and so I believe my expectations of him are realistic. I do not expect him to be able to work miracles, but I still allow myself to hope that he can. Only time will tell.

For today, I want him to enjoy the celebration in his honor. Just like every other president before him, he deserves it. Tomorrow morning, it's time for work. Hopefully a long eight years of work.

Congratulations, Mr. President.

I couldn't end this post without giving a little love to the Obama girls. Look how cute they are in their little outfits:

I have a special soft spot for Sasha, since she always seems to melt me in some way or another. Here she is, giving her dad a thumbs up. Adorable.

I think we are in for a great treat, having this family in the White House. I think his wife and children make President Obama a better man, and I think they will make him a better president. The decisions he makes will directly affect the future of those little girls. He has made it pretty clear that much of his focus is on improving this country for the sake of his daughters, and the rest of us certainly benefit from that.

I can't wait to see what can be done.

(All photos in this post from Getty Images)

Read more...

Oreo Cupcakes

Monday, January 19, 2009

If you love Oreos and chocolate, this recipe is for you.

Last week, I saw a photo of an Oreo cupcake on Cupcakes Take the Cake. "Chocolate cake filled with Oreos, topped with Oreo buttercream, and for good measure, one more tiny Oreo on top." Ummm, HELLO. These things spoke to me. They wanted me to make them at that very instant. The problem? Well, a lack of recipe. The photo was from a bakery's website, and well, bakeries don't usually go handing out their secrets.

So, I hit Google searching for just the right cake recipe, and of course, an Oreo buttercream recipe. I didn't find exactly what I was looking for, but I was nudged in the right direction. I figured, what the hell? I'll just get in the kitchen and experiment.

And that's what I did. My experiment? A COMPLETE SUCCESS. Mission accomplished.

See for yourselves:

It's really quite a shame that we don't have more leftovers, because I could so go for another one. But my waistline is thankful, I assure you. We took these over to a family dinner at my mom's house on Saturday night, and came home with just two cupcakes (the recipe made 24!). Not only did everyone indulge in one after dinner, but cupcake doggie bags were made for all.

OK, so let's talk about what I did. First, I searched for the most amazing chocolate cake recipe I could find. I have to admit that I had never made chocolate cake from scratch before, so I had to start new.

I had seen and heard good things about Hershey's "Perfectly Chocolate" Chocolate Cake, and after doing some poking around, reading reviews and such, I decided to go with it. My only modification to it was the addition of crushed Oreos in the batter. And well, it was the best chocolate cake I've ever had. Hands down.

Then, I took Wilton's buttercream frosting recipe (the one that I've made tons of times now, thanks to my cake decorating classes and my subsequent cake projects), and turned that into "Oreo Buttercream." And it was, well, amazing. Very sweet, but when on top of the "perfectly chocolate" chocolate cake? It was perfect.

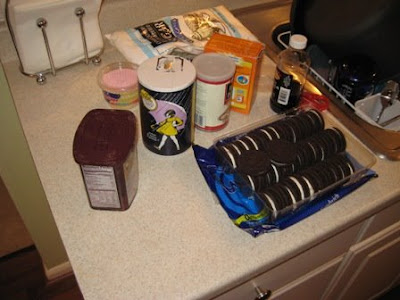
Before I began working on the cupcakes and frosting, I opened up my package of Oreos and started to cut them in half with a sharp knife. Some of them break, so I found it was best to do this in the beginning to ensure I'd get 24 good-looking Oreo halves to use for the tops of the cupcakes. The ones that broke, I set aside and used for the cake and the frosting. Between the cake, the buttercream, and the tops, I used the entire bag of Oreos (minus a cookie or two that my husband and I sampled).

Hershey's "Perfectly Chocolate" Chocolate Cake
(Source: Hersheys.com)

Ingredients:
- 2 cups sugar
- 1 3/4 cups all-purpose flour
- 3/4 cup HERSHEY'S Cocoa
- 1 1/2 teaspoons baking powder
- 1 1/2 teaspoons baking soda
- 1 teaspoon salt
- 2 eggs
- 1 cup milk
- 1/2 cup vegetable oil
- 2 teaspoons vanilla extract
- 1 cup boiling water
- 8-10 Oreo cookies, crushed or put through food processor (optional) - My addition

Directions:
1. Heat oven to 350°F. Grease and flour two 9-inch round baking pans (For cupcakes or other pan sizes, see variations listed below.)

2. Stir together sugar, flour, cocoa, baking powder, baking soda and salt in large bowl. Add eggs, milk, oil and vanilla; beat on medium speed of mixer 2 minutes. Stir in boiling water (batter will be thin). Pour batter into prepared pans.

3. Bake 30 to 35 minutes or until wooden pick inserted in center comes out clean. Cool 10 minutes; remove from pans to wire racks. Cool completely.

VARIATIONS:
ONE-PAN CAKE: Grease and flour 13x9x2-inch baking pan. Heat oven to 350° F. Pour batter into prepared pan. Bake 35 to 40 minutes. Cool completely. Frost.

THREE LAYER CAKE: Grease and flour three 8-inch round baking pans. Heat oven to 350°F. Pour batter into prepared pans. Bake 30 to 35 minutes. Cool 10 minutes; remove from pans to wire racks. Cool completely. Frost.

BUNDT CAKE: Grease and flour 12-cup Bundt pan. Heat oven to 350°F. Pour batter into prepared pan. Bake 50 to 55 minutes. Cool 15 minutes; remove from pan to wire rack. Cool completely. Frost.

CUPCAKES: Line muffin cups (2-1/2 inches in diameter) with paper bake cups. Heat oven to 350°F. Fill cups 2/3 full with batter. Bake 22 to 25 minutes. Cool completely. Frost. About 30 cupcakes. (I filled my muffin cups about 3/4 full to get bigger cupcakes, so I only got 24 out of the recipe.)
Oreo Buttercream

Ingredients:
- 1 cup shortening or butter (I use shortening so it doesn't have to be refrigerated)
- 1 tsp. vanilla extract
- 2 tbsp. water
- 1 lb. confectioner's sugar (if you don't have a scale, it's approximately 4 cups)
- 1 tbsp. meringue powder
- 12-14 Oreos, finely crushed in food processor

Directions:
1. In bowl of stand mixer, cream shortening, vanilla, and water.

2. Add confectioner's sugar, meringue powder, and crushed Oreos. Mix until well combined.

3. At this point, your frosting will be very thick. To top cupcakes, it's better to have medium to thin consistency icing, so you'll have to add more water. I probably added another 2-3 tbsp. to get the desired consistency, but you'll want to add the water little by little to make sure you don't add too much. When it's the right consistency, it should be pretty easy to stir by hand (think about whether you'd be able to easily squeeze it out of a piping bag). If you accidentally make it too thin (runny), add more confectioner's sugar.

Once cupcakes were completely cool, I used a piping bag to add a decorative swirl on top of each one. Then I pushed one half of an Oreo cookie into the frosting for garnish.

The result was the perfect Oreo cupcake. Enjoy!

Read more...

  © Blogger template On The Road by Ourblogtemplates.com 2009

Back to TOP