Showing posts with label home improvement. Show all posts

DIY-cation

Sunday, June 24, 2012

Michael and I are taking a random vacation day tomorrow. But here's the thing: We're using it to work our asses off--not behind our desks, but in our house.

Nora is going to daycare.

We're setting out on a home improvement extravaganza.

I haven't shared a kitchen update with you in FOREVER--I haven't even shown you (officially) what our cabinets look like with the doors on. But I've been procrastinating mostly because we have not done ANYTHING to it in weeks and weeks. I knew that our productivity with indoor projects like this would plummet once the weather was nice, hence my original goal of getting it done before late spring/summer hit. Oh well, what can you do? It'll get done eventually.

Tomorrow, our main area of focus is actually going to be on our guest room. My dad has been up to visit a couple of times since we moved here, but he has literally be staying in an empty room with a bed. And that room is actually the room we plan to make Baby #2's some day, so we need move to the official guest room. We're painting, need to finish the six panel door installation, and more. We're hoping to work on a few other miscellaneous projects, too.

It's pretty sad when you have to take a vacation to get things done around your house, huh? Such is life with kids... :) I'm actually really looking forward to having eight straight hours of uninterrupted DIY time.

Have you ever taken a vacation day just to get stuff done? Have you ever taken more than a day to tackle a big project?

Read more...

Spray Gunnin'

Thursday, May 3, 2012

I've been working a lot lately. In fact, I was actually at the office until 12:30 a.m. last Thursday night. It was nuts. But this week has been pretty normal, which is a nice break from the crazy.

In between crazy work days, I've been busy trying to keep things moving in the right direction with the kitchen. What have I been doing, exactly? Well, I've been spending a lot of time in here:

That's our basement, and that plastic is our makeshift "spray booth" for spray painting our cabinet doors. 
Respirator for the paint "dust," ear plugs for the compressor... sexy.
This whole process has been more exhausting than I thought--it takes me about two hours to do one coat on all of the doors--and that's just ONE side of the doors. Each side/coat is done separately, so I have done this four times so far. One coat of primer on each side (two nights), then one coat of paint on each side (two nights). I still have one more coat of paint to do on each side before I'm hopeful that they'll be DONE! 
 
Overall, I've been really happy with the results of spraying them. The paint goes on very smoothly, no brush/roller marks, etc. And even though it takes me two hours per coat per side, I have to believe that it's still faster than doing them by hand! 
 
Things are lookin' good! I can't wait to get these bright babies hanging back up in our kitchen!
 
I'm hoping to do the last two rounds this weekend. We'll the let the doors "cure" for a few days before hanging them back up, so the goal is to have them hanging by NEXT weekend. And if that happens, you know I'll be back with photos! Woot woot! 

Read more...

A Simple Project

Tuesday, May 1, 2012

A few weeks ago, amidst my recovery from my work travel to Boston and a still-very-busy week at work, I had ONE night during the week during which I could do whatever I wanted. I was still really motivated to keep things moving on the kitchen, but didn't want to tackle anything crazy, so I asked Michael if he wanted to go ahead and replace the faucet in the kitchen sink. It was something we had been looking forward to doing for a long time, but something easy.

Start and finish. In and out. Bada-bing, bada-boom.

I had grand plans to write a blog post about how the kitchen faucet is one of those projects that is so simple, that if you haven't done it already (and is something you want to do)--you're cheating yourself.

And then this "simple" project turned into THREE HOURS of sweat, blood, pain, and lots and lots of cursing.

You should totally still do it, though. If you don't believe me, just take a look at these pics.

BEFORE:


AFTER:
Hell yeah. Talk about a little detail making a big difference, huh?

As you can see, we swapped out the faucet itself, and then did away with the separate sprayer and instead replaced it with a soap dispenser so we could get rid of the eye-sore of a soap bottle on the countertop. The end of the faucet actually pulls out as a sprayer, so we didn't lose the spray functionality at all.

So, backing up a minute. We picked out and bought the faucet a while ago--before we even started the kitchen project, actually. It was one of those things that we thought we'd be doing fairly early on, but then decided that we'd finish making huge messes (drywall, paint, etc.) before installing such a pretty new piece of metal. But here is the faucet we chose:
We found that Lowe's and Home Depot have a pretty nice selection--lots of options that are fairly similar, but with different little details to strike your individual fancy.

When we finally went to tackle the install, we did it the same way we had with our faucet in the condo--with a basin wrench, which is apparently a must-have for this type of project, and for good reason. You can't easily reach the bolts that attach a faucet to the sink, because the sink itself is in the way. This makes it nearly impossible to squeeze a regular wrench in there and get a good angle on it to remove the bolts, so this basin wrench tool comes in handy.

But we quickly found that our bolts were so rusted on that even the basin wrench was useless on its own. We wrestled with those bolts for a loooong time. Well, Michael mostly wrestled with them, but I jumped in to try my hand at it whenever he came out from under the sink for a break. When the good ol' basin wrench + brute force was not working, we busted out some tricks--WD40 at first, but then we resorted to taking a hammer and a chisel to the damn things. That ended up being the winner, by the way--Michael ended up chipping away enough rust so that he was able to finally break the bolts loose with the basin wrench.

The problem with all of this time spent under the sink was that it wasn't very comfortable. Safety goggles are a must, because rust and all sorts of other nasty debris kept falling in our faces as we worked. Plus parts of the cabinets and pipes were digging into our backs and shoulders during our turns under the sink, so... unpleasant, to say the least.

Once the old faucet was removed, though, things got a lot easier. We had a few minor snafus with the new faucet (Delta, your instructions kind of suck!) but it was really not a big deal and we got the faucet on pretty easily.

Let's look at a few more pics, shall we?

AFTER:

And one more beauty shot:

We love it!

If you're looking for a relatively inexpensive, relatively easy upgrade for your kitchen, look no further than your faucet. It really does make a huge difference--you won't regret it!

As for an update on our own kitchen, well, it's hopefully coming soon. April pretty much sucked in the kitchen productivity department--for a variety of reasons--but May is looking up. Yes, we're officially three months into this "party" now. Fun times. I'm not even going to set a new goal for a finish date because, well, I don't want to blow it again. We're just taking it one step at a time!

Read more...

Kitchen Reno: Let There Be Light

Wednesday, March 28, 2012

You know, a light at the end of the tunnel. Or, under-cabinet lighting. Whatever.

Either way, things are seemingly starting to come together. Don't get me wrong--we are still not even close to being finished, but we're getting there. Slowly, but surely. You might remember that I hoped to be completely done by the end of March.

HA.

Haha.

HAHAHAHAHAHA.

Oh well, that's just the way it goes, right? House projects take three times as long and cost twice as much as you anticipate. Or so I'm told. I don't really like to keep track of such things. :) But since I've at least been documenting timing along the way, the missed "deadline" is difficult to ignore.

Let's move on to some photos and talk about progress made from last week, huh?


A lot of the progress this week was electrical. Our electrician spent a few evenings and a good chunk of Sunday afternoon at our house, wiring outlets, the under-cabinet lights, adding switches, and more. It's nice to finally get all of those stray wires connected to things!

Michael and I also hung the rest of the upper cabinets. What a pain in the ass that process is. But it's done, and we're hopeful that they're all in the right position and won't need to be moved again anytime soon!
Ignore the messes in the cabinets, we're just starting to try to get our lives semi-organized again! But check out that pendant light above the sink. We installed that on Sunday night. That light fixture was something we ripped down way back in August, but didn't put anything new in its place... until now. It feels so amazing to have it up there and looking so nice!

I look at this pic and hear angels singing. Why? Because THE MICROWAVE IS BACK UP OHMYGOD. If you look back at my previous kitchen renovation posts, the over-the-range microwave has been living on the countertop (taking up an ungodly amount of space) for the past several weeks. In order to open and/or close the door, we had to keep tilting the microwave backwards--it was just ridiculous, really. We re-installed it in its rightful place on Sunday afternoon and it was easily one of the most satisfying tasks we've completed so far. Strange, but true.
Because I finally got the second coat of paint on all of the cabinet frames, we were able to put things back in the cabinets. And hey, we put the basement door back on the hinges! Victories.

Then, because my dad was coming into town (he's here!), we CLEANED. Imagine that.

We are about thisclose to being able to start spray painting some cabinet doors, people. I.am.psyched.
Here are how things look with the pendant light and a few of the under-cabinet lights lit up. I'll have to try to take some more pics one of these evenings to better depict the ambiance. :)

What's up next? Well, we're actually going to try to give ourselves a little bit of a break this week while my dad is here. Turn down the pressure to get things done. Relax a little more. We want to tackle some smaller projects if we can, but overall, we're going to try to take things easier than we have been. As much as we want to get things D-O-N-E, it's probably good to cut ourselves a little slack.

More to come.

Read more...

Kitchen Reno: The Grass is Greener

Monday, March 19, 2012

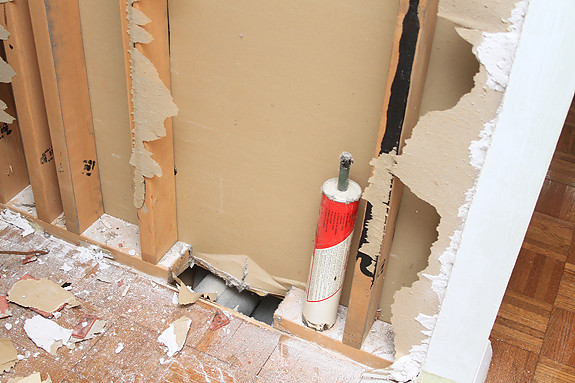
...and so are the walls.

It's been two weeks since I last updated you, and well, things are a lot different. But they're also largely the same in that they are STILL A FREAKING MESS.

I gotta say: We're six weeks in and I am so.over.this. Which is unfortunate, since we're most definitely not going to meet my initial deadline of March 31 to have everything done. In fact, I don't think it's going to be even close. Ugh.

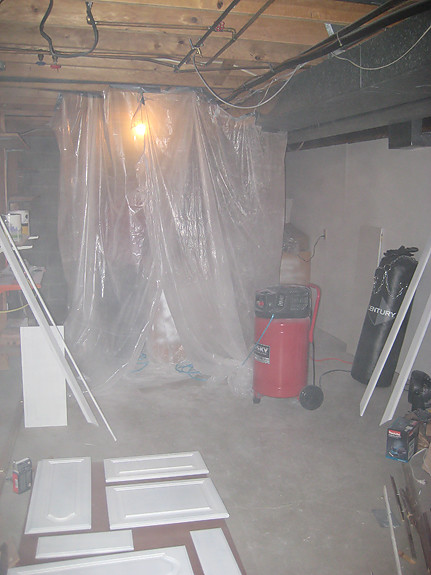
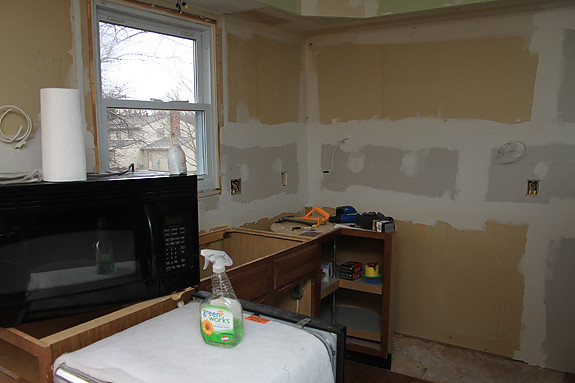
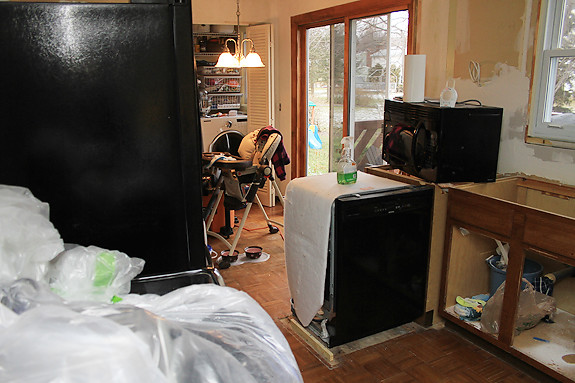
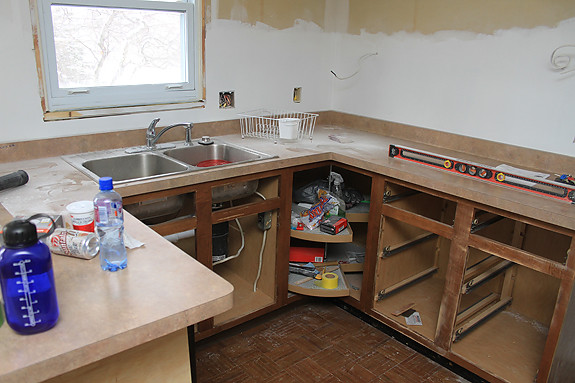
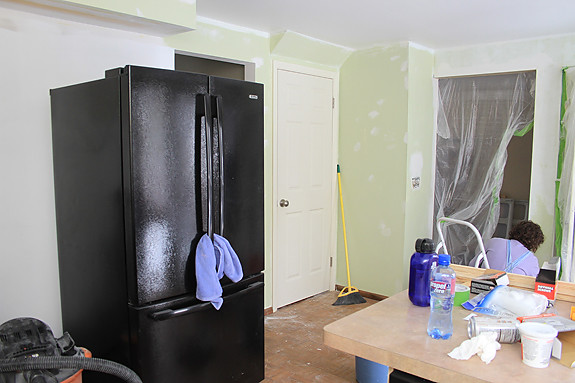
But, instead of focusing on the neverending nature of this project, let's just take a look at everything that has been accomplished over the last two weeks. First, I have to admit that I have not taken a whole lot of photos. I don't know, I guess in my state of being tired of it all, I got too lazy to even document our work. And then I meant to take photos in natural light this weekend and never got around to it, so... I just finally took some tonight.

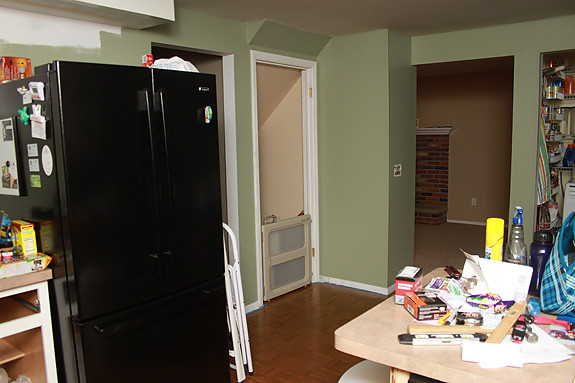
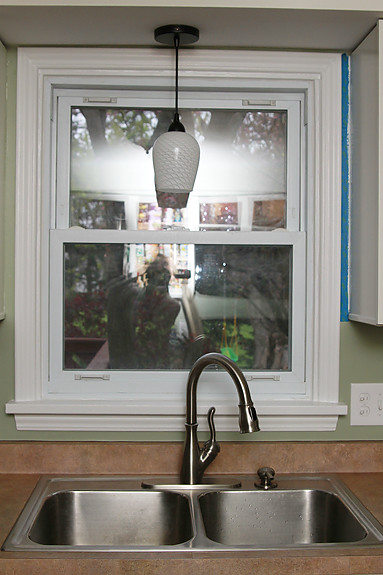
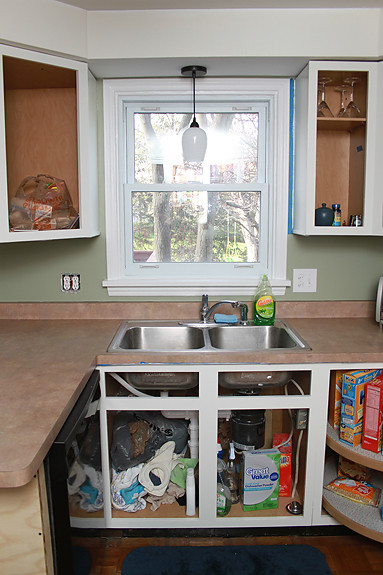
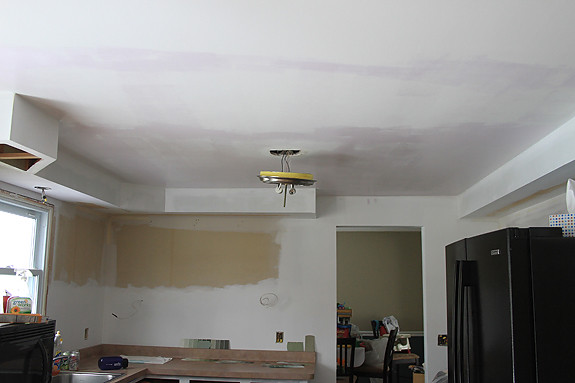
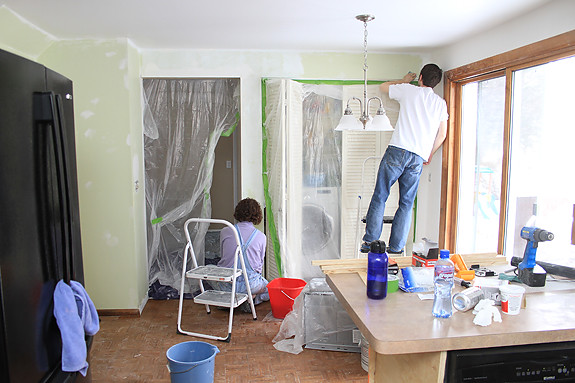
Obviously, one of the biggest things--which I already mentioned in the title and beginning of this post--is the GREEN! The walls have COLOR, people. And we LOVE it. Needless to say, after the great paint debate of 2012, we bit the bullet, got the paint tinted, and we hit the nail on the head. It is exactly the green that we wanted. THANK GOODNESS. (It is Sherwin Williams "Clary Sage," by the way.)

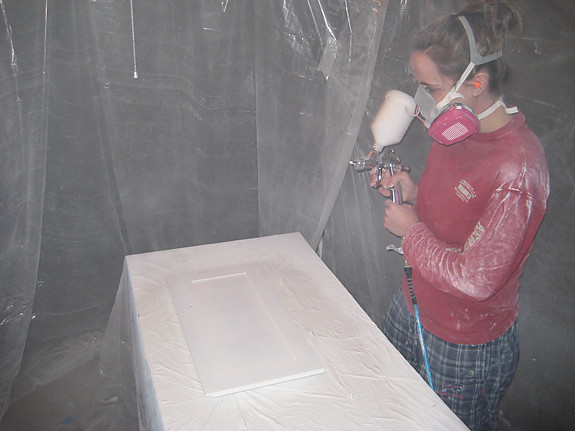
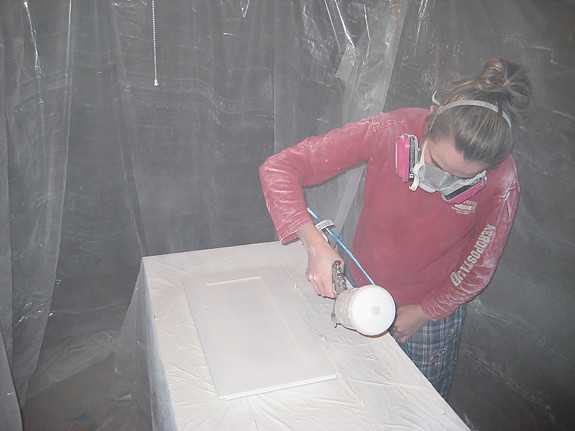
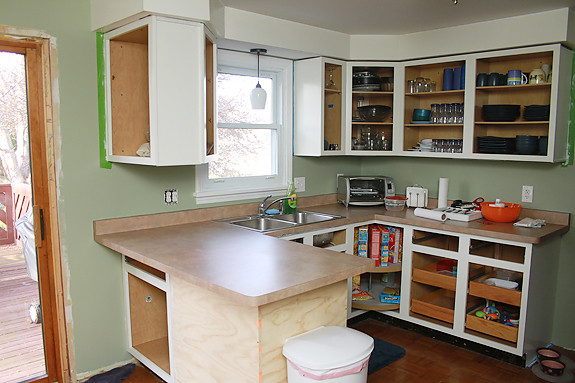
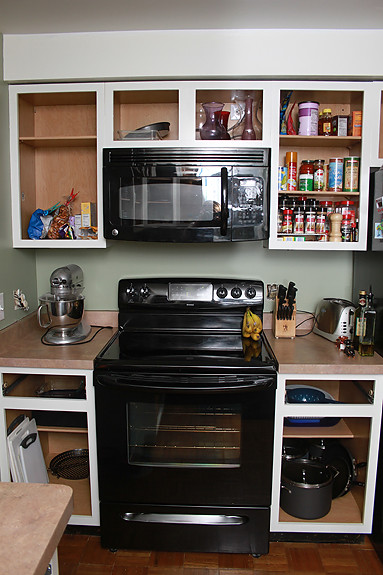
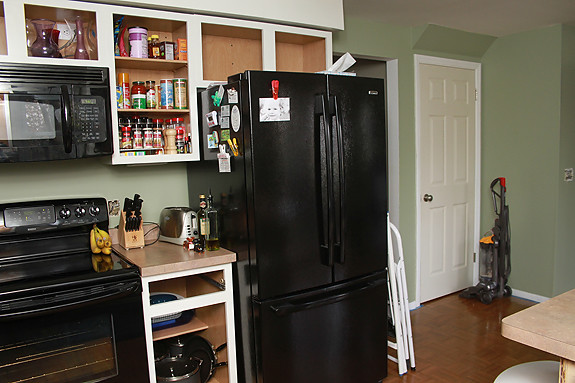
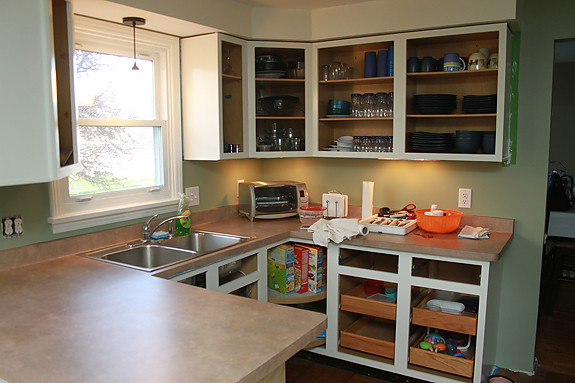
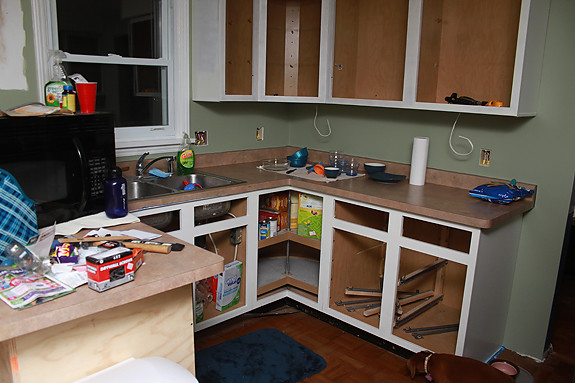
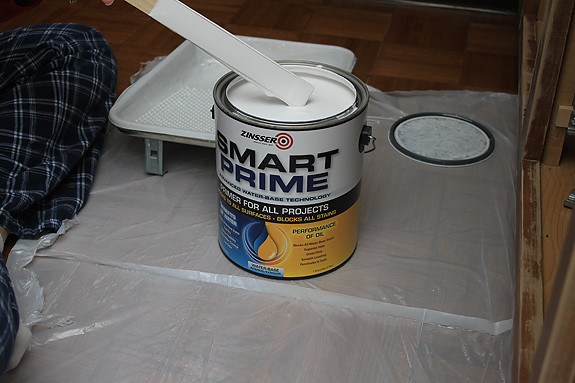
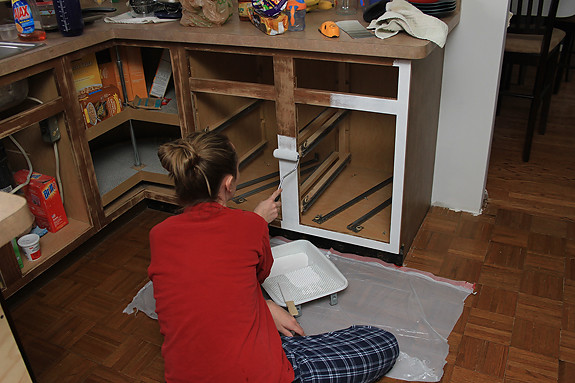
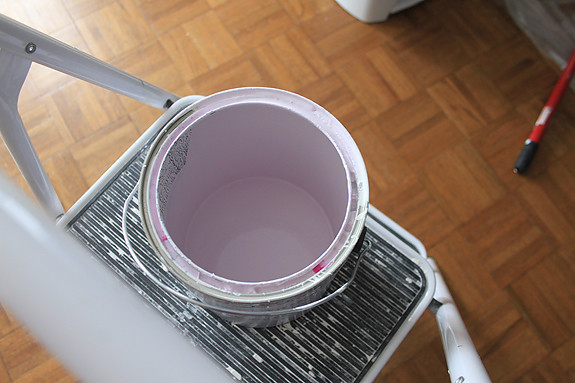
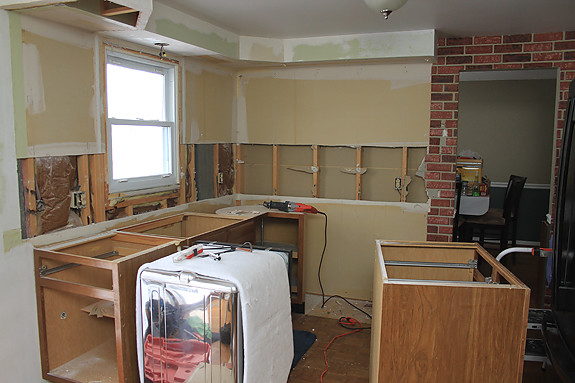
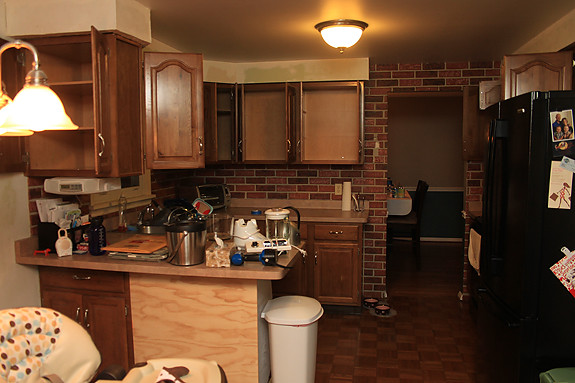
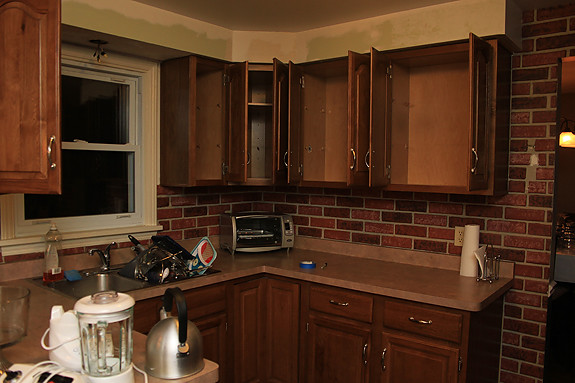
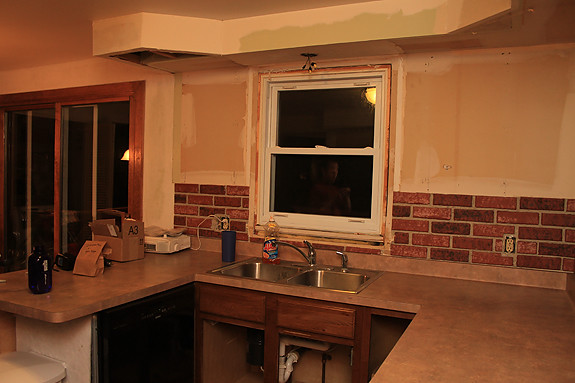
Basically, there's just been a whole lot of painting going on around here the last few weeks. After the walls, it was more cabinets. We deglossed, sanded, and cleaned all of the upper cabinets, and then I primed them. Then, we finally chose a cabinet paint color (a soft/creamy white called "Paper Mache" from Benjamin Moore), and I've got at least one coat of paint on all of the base cabinet frames.

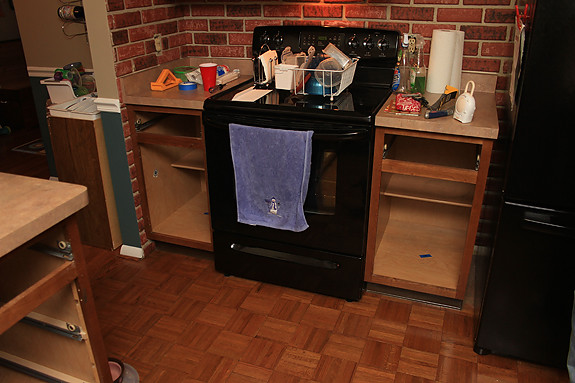
Except these over here. These have two coats (so they're done). And hey, look at them! They're back in place on either side of the stove. That was an accomplishment in and of itself--to return the kitchen back to its rightful layout. Hooray for having more counterspace back!

I've also painted two coats of the cabinet paint on the soffits. We plan to add crown moulding around the top of the soffits, and since they're painted to match the cabinets, they should trick the eye a bit and make things look a bit bigger and more open than if we had painted the soffits green like the walls.
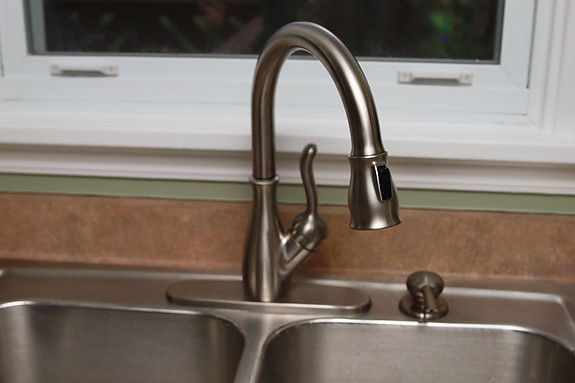
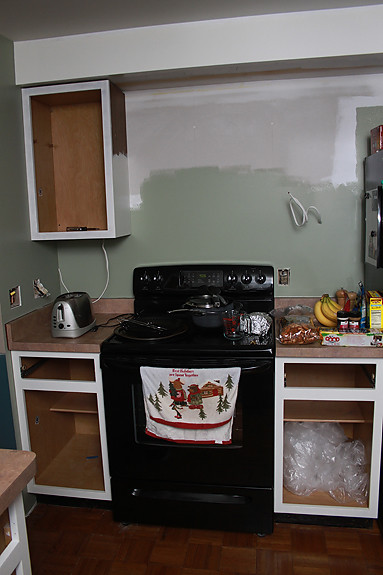
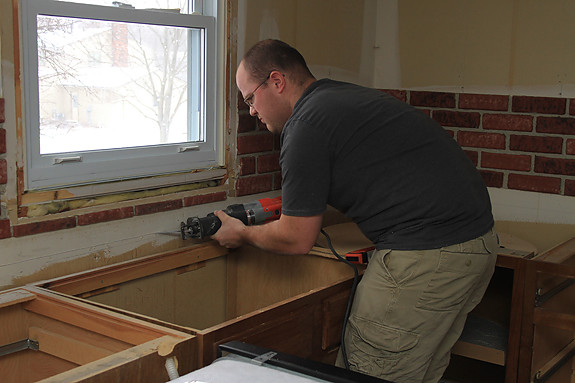
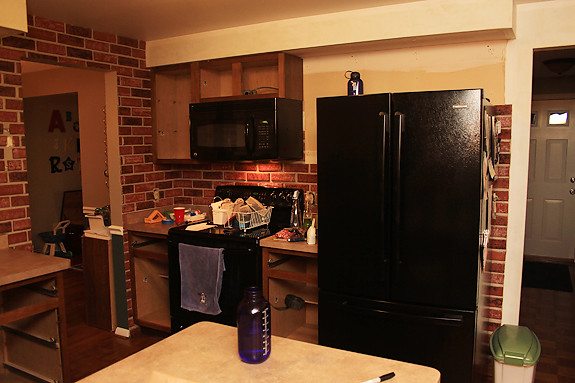
Last night, we did something really big--we started hanging those upper cabinets back on the walls. And let me tell you, that's a real bitch. Especially because it was just the two of us. Michael basically had to support the weight of the cabinets himself (and some of them are giant and HEAVY!) while I checked for levelness, spacing, pulled the wires for the cabinet lights through the holes we drilled, etc. It was not an easy process, and my screaming muscles were proof when I woke up this morning. We have a few more to hang up, but we have to wait for the electrician to come to wire through the back of the one that goes above the microwave before we continue on down the wall.

I cannot WAIT to get that microwave back up on the wall, too. Holy moly, that thing is a monster when it sits on our countertops like that.
Oh! On Friday, we also used our brand new compressor and nail gun to put the window trim back on above the sink. And then we caulked and painted that; good times.

See? So there's been progress. I suppose there's actually been lots of it.
At this point, our short-term goal is to get the rest of the cabinets up on the walls and get them painted (the upper ones are only primed right now) so we can put stuff back into the cabinets. We still won't have doors for a while--we've barely even started 
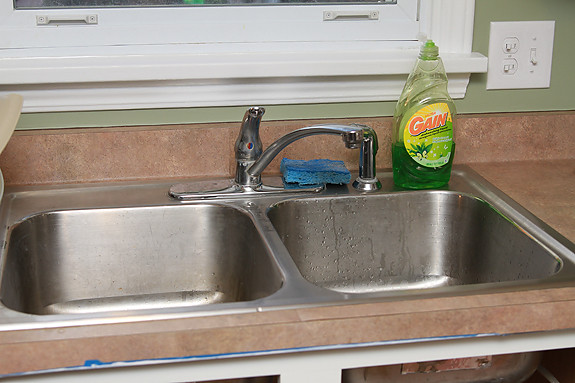
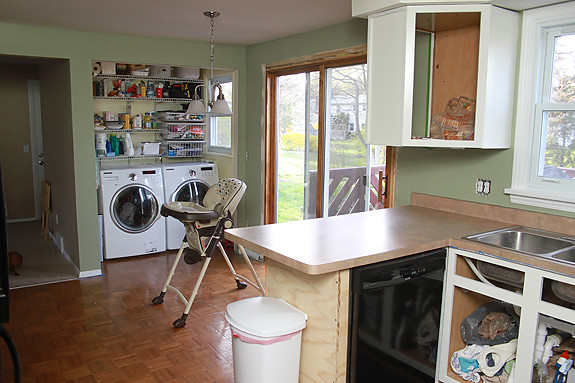
prepping them for primer at this point--but at least the kitchen will be fully functional, with STORAGE. I swear we have countertops underneath all of the mess you see in the photos. We just have nowhere to PUT anything.

My dad is coming into town to stay with us for nearly a week, starting on March 27. That means we have just a little more than a week to get things into shape, and we're determined to get 'er done. I'll keep you posted!

Read more...

Kitchen Reno: Prepping and Priming

Sunday, March 4, 2012

We're one month into our kitchen renovation.

On the one hand, I can't believe how far we've come in just a few short weeks. On the other hand, I look at how far we still have to go, and can't believe we're already a month into it. I originally had the idea that we could be completely done with everything by the end of March (so, I basically gave ourselves two months--seemed generous) but now I'm wondering if even that was a little too ambitious.

Just keep swimming. I'm trying to break this up into digestible chunks of work, because when I start thinking about it as a whole, it's too overwhelming. All we can do is take one thing at a time.

There were exciting parts of this week, and there were boring oh-my-gosh-let's-just-get-this-over-with parts.

On Thursday night, I started deglossing some of our base cabinet frames with TSP-PF. The guy at Home Depot tried to tell me that I wouldn't need to bother sanding after using this stuff, but after he raised my expectations, I was not all that impressed. It did do its part to clean the cabinets well, and I think it did help remove some of the glossy protective coat on the cabinets, but I didn't feel comfortable just priming from there. We want this paint job to be as durable as possible, so we decided to follow all the info I've been reading and sand, even though it's a giant pain in the keister.

So, Friday night was some sanding. We used the palm sander and 150 grit paper. Now THIS seemed to do a good job. It removed the finish in some parts, and in the places where it didn't, it did severely dull the surface. I went over everything with the sander twice, then did a good wipe down/clean up again to remove any dust.

Come Saturday, I was feeling pretty confident that it was well prepped for primer. So, I busted out the primer and got busy.

I've read about a zillion cabinet painting tutorials, and after talking to one of the experts at a local paint store, this was confirmed to be the best product for the job. This is Zinsser Smart Prime. They claim that it's the performance of oil-based but with the benefits of water-based primer. So far, so good. I like working with it.

The bases were a bit tedious with the door and drawer openings. I eventually figured out that the best method was to do the inside lip of the openings first, then go over the fronts to fix any drips. I got better and faster as I went, but it still took me about two hours to do all of our base cabinet frames. All was OK, though; I was listening to "Overboard" on TV. Can't go wrong with Goldie Hawn and Kurt Russell.

"I just... ate a bug!"

ANYWAY.

It felt really good to get some primer on those cabinets. I'm more looking forward to doing the doors since we plan to spray those, but at this point, putting white paint on those dirt-colored cabinets was extremely satisfying, no matter which method I was using. And it has already made a huge difference--just wait a minute and I'll show you. :)

First I must discuss the great paint debate of 2012. For the love of all things Sherwin Williams, I have not ever had this much trouble choosing a paint color. Back when we first bought the place, we thought we were going to paint the kitchen a goldish-yellowish-creamish color. And, while it was still in the running initially, it just didn't seem to be quite right. Then we thought we'd go with a gray color, but after staring at about 25 shades of gray, that didn't seem to fit either. Then we landed on green. And, although we are sold on green at this point, and although we *think* we have our shade picked out, I think it'll still be a split second decision this week.

Although the one in the middle was the initial favorite, after staring at it for a good 24 hours or so, I was no longer convinced. The one on the left (highlighted with the red arrow) is our current leader. And no, your eyes are not deceiving you--they really aren't very different from one another. Gah.

During Nora's nap today, we were back to work. Michael continued prepping more cabinets in the basement while I tackled a completely lackluster job--repainting the ceiling. BLAH. I really was not looking forward to it at all, because come on... the ceiling is boring. However, I must say that I have gotten way better at it since we've moved in. Back in August, I painted Nora's ceiling and it nearly drove me to drink. It was awful. It was impossible to tell where I had painted, I applied everything unevenly, streaks were visible, my neck was killing me... I ended up painting the damn thing like three or four times and I swore I would never paint another ceiling again.

Of course, after we redid the drywall (including the ceiling!) in our family room this past fall, ceiling painting was upon me again--and I pulled out all of the stops. I Googled the "proper" way to paint a ceiling and watched YouTube tutorials. (Who knew that you were just supposed to paint in straight, overlapping lines? I had always been taught to do the damn "W.") I also armed myself with a secret weapon: PINK PAINT.

Have y'all seen this stuff? It's Glidden's EZ Track Ceiling Paint, and it.is.glorious. It became my best friend in the fall, when I had to paint the family room ceiling way more times than I wanted (it was a drywall/mudding problem, not a paint one). So EZ Track and I became reacquainted this afternoon. Yay.

The gist is that the paint goes on pink, but dries white. Pink so you can see what you're doing and where you've painted--white so that your ceiling looks fabulous when it's done.

See the pinkish/grayish streaking going on up there? This was after I had painted the entire ceiling, so it was in the middle of drying. The parts closest to you were done first, so they are pretty much completely dry, while the portion furthest away from you is wet. Cool, huh?

This is after it has already dried quite a bit, but you can still see the pink hue. (Don't mind the busted looking drywall right there--we ripped out and are replacing the door jamb for the laundry closet.)

For good measure, I'll be doing a second coat of paint on the ceiling tomorrow, and then I'll get to move onto the walls--COLOR!! I'm pretty excited to add color. I just hope I end up liking what we choose.

Oh, and here's what the rest of the kitchen is looking like:

Still a freaking disaster, but LOOK! The beginnings of white cabinets! Wheee!
It's amazing how adding a little primer can change the way things look so dramatically. The countertop, in my eyes, looks like a completely different countertop. Before, it seemed to be sort of pinkish somehow, but not anymore. Hooray.

The next time I update, things should be looking significantly green around here. And hopefully we'll have made some good progress on the upper cabinet frames, too. Currently, we're trying to decide if we should rehang the uppers BEFORE painting them (after priming, definitely), or after they're done. While it would be easier to paint them while they're down, I'm afraid we're going to end up damaging the paint job while getting them back up, so... you can imagine which way we're leaning. Any experience out there?

Hopefully you're not sick of my kitchen updates (and infrequency of other posts, sorry!) already? Fun times--and more progress--are ahead.

Read more...

Kitchen Reno: New Walls

Sunday, February 26, 2012

It has been a hell of a couple of weeks as far as our kitchen renovation goes, and I figured it is time for an update, even if it is not a very exciting one! When I last posted about it, we had ripped out all of the brick--taking a good portion of our drywall with it--and we were staring at studs. We were also waiting on an electrician to come in to run the wiring for under-cabinet lights--and fix a few other things as well--while we had the walls open.

Well, on the same day that Nora had her ear tubes surgery, the electrician did come and run all of the wiring. The next day, my brother came over again and helped us to measure, cut, and hang all of the new drywall. It took a lot longer than we anticipated, and was a pretty full day of working, so I was bad and didn't take any pics of that process. But, once we were done and we had the chance to do some mudding, things were looking like this:


After that, things got... unbelievably messy. Dear lord, I forgot how much I absolutely HATE sanding drywall mud. After one night of sanding, I declared our house uninhabitable for anything except for sleeping.

I thought living without a kitchen sink was difficult, but this was so.much.worse.

We made the decision to retreat to my mom's house after work every night, where we cooked and ate our dinners, then came home to put Nora to bed AND GET TO WORK. We worked on the kitchen every.single.night this past week, because honestly, it was hell and we just wanted to do whatever we could do to get it done as quickly as possible.

It was a crazy and exhausting week. Especially since work is ridiculously hectic right now, too. Let's just say: Stress? I have it.

We were bound and determined to get our base cabinets back into place so we could get our countertops and sink back on this weekend. Even after working every night, we were still left with a lot to do in preparation for the countertop placement, so we actually had to cancel plans with friends on Friday night in order to get the job done. :(

BUT! But, thanks to help from my mom and kicking it into high gear on Friday night, we did get it done, and my brother showed up on Saturday morning (third Saturday in a row, he's the best brother ever!) to help us get the cabinets, countertops, and plumbing back into place.

As of yesterday afternoon, the kitchen was looking like this:

That's Michael and my mom scouring the old wallpaper glue off of the walls. If you go back and look at the "before" pics, you'll see that the walls over there look white. Well, as it turns out--that was all GLUE! Scrubbing led to the discovery of nice, smooth, GREEN walls underneath. Who knew they could look that clean??

As of this moment, the kitchen looks pretty much like this except the green walls are gone, because I finished priming everything during Nora's nap this afternoon. Yippee!

Also, the boards that are leaning in around the dishwasher in the pics above have finally been attached to each other and the cabinets, building the surround around the dishwasher. That has only been six months in the making!

We still have a long road ahead, if you can't tell. Two weeks in (three weeks when you count the prep), I'll admit that I am tired of it already. I'm running out of steam, but I'm hoping to get the walls stuff officially finished within the next day or two so we can move onto something else (painting cabinets!) to get me excited about it all again.

We've had some trouble with air bubbles forming in our mud (we had the same problem in the family room), so now that the walls are primed, I actually had to go back over areas of them with spackle to fill in tiny little holes that formed from the air bubbles popping. It's a pain in the ass, and I don't know what has caused this problem for us--but it is what it is, and I expected it to happen this time since we had already been through it with the family room. I spackled the areas tonight, hope to sand them tomorrow, and then we can hopefully clean the dust off of everything once and for all so we can have a (somewhat) functional kitchen again.

We're currently trying to decide on a wall color. Sherwin Williams is having a sale later this week so we want to snatch up our paint! We are looking at shades of gray. The countertops have some gray in them that we want to pull from, and we think that it'll contrast well with the soon-to-be white cabinets, and the darker wood floors that we're hoping to get installed after this mess is over.

More to come!

P.S. In case you don't follow Heather Drive on Facebook (you totally should, click here), I wanted to share a cute video we got of Nora and Hunter dancing and singing to "The Hot Dog Song" yesterday. They love Mickey Mouse Clubhouse!

Read more...

Kitchen Reno: Brick Be Gone

Sunday, February 12, 2012

DING DONG, THE BRICK IS GONE. Can I get a hallelujah??

After all of the demo prep work we did throughout the week, the actual demo took just a couple of hours. My brother and sister-in-law rolled up at our house shortly after 9:00 a.m. yesterday morning. Marie took Nora for a little one-on-one auntie/niece time, and Tyler stayed to help us out.

As a reminder, this is what the kitchen looked like on Friday night:

We got to work right away. Tyler helped us with disconnecting the plumbing under our sink, and getting the over-the-range microwave disconnected and uninstalled. The hardest (and scariest) part of the whole thing was removing our gigantic piece of countertop without breaking/damaging it. But, the three of us managed to support it in all of the right places and moved it into our front entryway successfully. So yep, our house pretty much looks like a war zone right now.

But DUDE. The brick is gone. So 'sall good. :)
In the lead-up to all of this, Michael and I couldn't decide which tool would be best for cutting the drywall. We didn't want to remove ALL of the drywall in the room--just the parts with the brick. We did some asking around, talked to several workers at Home Depot, etc. The problem was that we didn't want to invest in a tool that we didn't have another immediate use for. So even though things like the Dremel Saw Max and the Dremel Trio sounded like they could be our answer, we hesitated.

Then, on our last trip to Home Depot this week, one of the guys there suggested that we just "score" the drywall with a sharp utility knife, and go from there. At the last minute yesterday morning, I texted Tyler and asked him to bring his sawzall, really as a "just in case." As it turns out, this was the perfect tool for the job. Tyler was able to control the depth at which he was cutting pretty well just by feel, so being able to set a fixed depth (which is why we were looking into those other tools) was not an issue. It was certainly WAY FASTER than working with a freaking utility knife, so... yay!

Once Tyler cut our "seams" for us, things started moving very quickly. Soon, we (and by "we," I mean Michael and Tyler, haha) were tearing off gigantic pieces of brick.

We were definitely not sad to see it go.
The brick "backsplash" on this side of the room was the first to go.

Then we tackled the "big wall." For this wall, we actually did end up tearing the whole thing down to the studs, since the pattern of the brick was so erratic. If we had cut out only the brick, it would've been like putting together a puzzle with the new drywall and the old, and there would've been a lot of seams to mud/sand/finish. This way, we can use fewer, larger pieces of drywall when we go to put the new stuff up.

I never thought we'd be so happy to see studs. :)

We also found this "gift" in the wall for us, from the original contractors who built the place. An empty tube of caulk/liquid nails material. From 1973. Couldn't they have left us, oh, I don't know, some cash? That would've been a fun find.

The last piece of brick we tackled was this spot above the doorway. It was firmly attached to two studs, so it was kind of a pain in the ass. But, with a lot of muscle, Tyler got it down, once and for all. And all of the brick-covered drywall went directly into the trash.

Onward and upward.

We had an electrician come today to take a look at things. We're adding under-cabinet lights, and need to replace some of the outlets with GFCI outlets. We also want to move a few switches around, add a couple of new ones, etc. So, we're hoping the electrician will be back to do that work sometime this week, so we can begin to put the walls back up on Saturday.

After all of the demo, we cleaned everything up pretty thoroughly, and organized the kitchen back into a relatively-operative configuration. The most disruptive thing is, of course, not having a sink or a dishwasher. TORTURE. We usually throw everything we can into the dishwasher, and run it every other day, if not more often. Now, we not only have to wash dishes by hand, but we have to do it in the utility sink in the basement. First world problems, I know, but still, I whine just a little. :)

For now, we just have to keep our fingers crossed the electrician can get his part done this week so that we're not delayed from putting the walls back up on Saturday. The sooner we can get them back up, the sooner we can get our sink and countertops back. It's the little big things, right?

Read more...

Kitchen Reno: Prepping for Demo

Friday, February 10, 2012

This week, we've been working on preparing the kitchen for demo. We've tackled it in small chunks, doing an hour or two of work every night.


It started with emptying cabinets, then removing doors and hardware (in preparation for painting the cabinets, of course).

And then it escalated into removing the upper cabinets, then all of the lower cabinet doors and hardware. We also pried off the trim and window sill from around the window.

So, here's where we're at as of this very moment:

We're waiting until tomorrow morning to remove the microwave, so we have to wait to remove those last two cabinets. That one on the left side is actually totally detached from the wall. We unscrewed all of the screws and then realized that we couldn't slide it out--because it's being held in place by the damn brick!

We were pretty sure that the cabinets were not original to the house (they seem to be better quality than builder-grade), but we weren't positive. Once we took down the big cabinet that used to be to the left of the window, our suspicions were confirmed, thanks to the soffit. The original soffit is even with the rest of it, but they built out the soffit a bit to accommodate the bigger cabinet.

Don't you love the floral shelf paper lining the lazy susan? *gag*
Once the kitchen reno is over, I promise we will invest in some "grown up" dish towels. :)

So, there you have it. We are heading to bed to rest up to begin some serious demo in the morning. If all goes well (fingers crossed!), we will officially be rid of all of the brick by this time tomorrow night.

Wish us luck!

Read more...

  © Blogger template On The Road by Ourblogtemplates.com 2009

Back to TOP