
A Simple Project
Tuesday, May 1, 2012
A few weeks ago, amidst my recovery from my work travel to Boston and a still-very-busy week at work, I had ONE night during the week during which I could do whatever I wanted. I was still really motivated to keep things moving on the kitchen, but didn't want to tackle anything crazy, so I asked Michael if he wanted to go ahead and replace the faucet in the kitchen sink. It was something we had been looking forward to doing for a long time, but something easy.
Start and finish. In and out. Bada-bing, bada-boom.
I had grand plans to write a blog post about how the kitchen faucet is one of those projects that is so simple, that if you haven't done it already (and is something you want to do)--you're cheating yourself.
And then this "simple" project turned into THREE HOURS of sweat, blood, pain, and lots and lots of cursing.
You should totally still do it, though. If you don't believe me, just take a look at these pics.
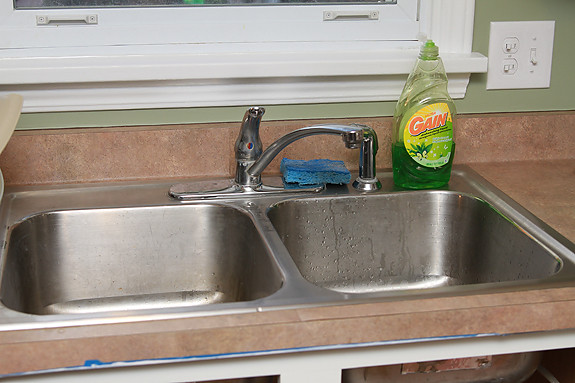
BEFORE:
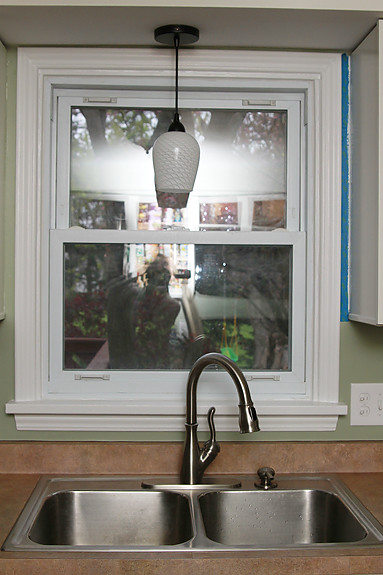
AFTER:

As you can see, we swapped out the faucet itself, and then did away with the separate sprayer and instead replaced it with a soap dispenser so we could get rid of the eye-sore of a soap bottle on the countertop. The end of the faucet actually pulls out as a sprayer, so we didn't lose the spray functionality at all.
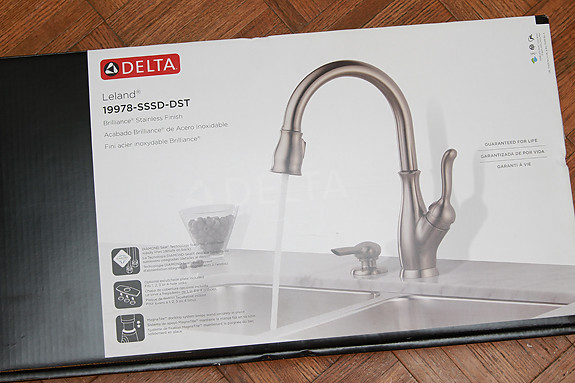
So, backing up a minute. We picked out and bought the faucet a while ago--before we even started the kitchen project, actually. It was one of those things that we thought we'd be doing fairly early on, but then decided that we'd finish making huge messes (drywall, paint, etc.) before installing such a pretty new piece of metal. But here is the faucet we chose:
When we finally went to tackle the install, we did it the same way we had with our faucet in the condo--with a basin wrench, which is apparently a must-have for this type of project, and for good reason. You can't easily reach the bolts that attach a faucet to the sink, because the sink itself is in the way. This makes it nearly impossible to squeeze a regular wrench in there and get a good angle on it to remove the bolts, so this basin wrench tool comes in handy.
But we quickly found that our bolts were so rusted on that even the basin wrench was useless on its own. We wrestled with those bolts for a loooong time. Well, Michael mostly wrestled with them, but I jumped in to try my hand at it whenever he came out from under the sink for a break. When the good ol' basin wrench + brute force was not working, we busted out some tricks--WD40 at first, but then we resorted to taking a hammer and a chisel to the damn things. That ended up being the winner, by the way--Michael ended up chipping away enough rust so that he was able to finally break the bolts loose with the basin wrench.
The problem with all of this time spent under the sink was that it wasn't very comfortable. Safety goggles are a must, because rust and all sorts of other nasty debris kept falling in our faces as we worked. Plus parts of the cabinets and pipes were digging into our backs and shoulders during our turns under the sink, so... unpleasant, to say the least.
Once the old faucet was removed, though, things got a lot easier. We had a few minor snafus with the new faucet (Delta, your instructions kind of suck!) but it was really not a big deal and we got the faucet on pretty easily.
Let's look at a few more pics, shall we?

AFTER:
And one more beauty shot:
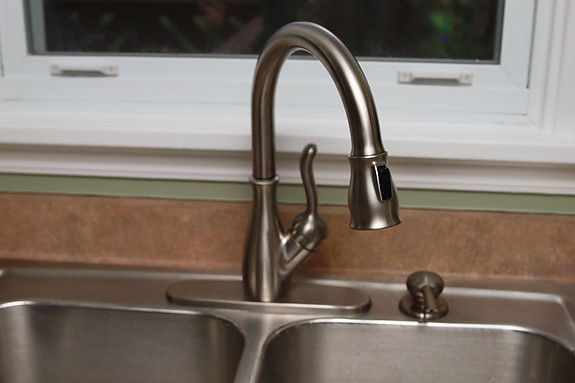
We love it!
If you're looking for a relatively inexpensive, relatively easy upgrade for your kitchen, look no further than your faucet. It really does make a huge difference--you won't regret it!
As for an update on our own kitchen, well, it's hopefully coming soon. April pretty much sucked in the kitchen productivity department--for a variety of reasons--but May is looking up. Yes, we're officially three months into this "party" now. Fun times. I'm not even going to set a new goal for a finish date because, well, I don't want to blow it again. We're just taking it one step at a time!


4 comments:
Can you explain how the soap dish works? Is there some hidden dispenser under neath? How do you refill it. I've never seen anything like that before. Thanks!
LOOKS FABULOUS BTW
Looks great!
I love this. My husband and I recently did this and had a similar problem only it was plastic nuts and instead of turning we just mangled the plastic. We ended up sawing them off. I love your new faucet, I wish we could have something like this except we wouldn't be able to hook it up to the portable dishwasher.
@Amy Kay--Yes, there is a hidden dispenser underneath! It's like a plastic bottle that you screw into the underside of the pump attachment. To refill it, you lift the pump part out (super easy, you don't need to unscrew it or anything) and just squeeze your dish soap into the hole, then put the pump part (with the little straw thingy) back down into the hidden bottle. Love it! And thanks!
@Vanessa--Thanks!
@Jess--Gotta love home improvement challenges! Sawing them off? Isn't that ridiculous that it's necessary to do that? Ugh. Glad you ended up figuring it out too, though. There's always a way! :)
Post a Comment