Showing posts with label recipes - breakfast. Show all posts

Strawberry Puree Pancakes

Monday, May 14, 2012

Three years ago, I went on the hunt for a strawberry pancake recipe. I found one, and made it. And sure, it was good--but it wasn't exactly what I had been looking for. We found that adding strawberry chunks to the batter resulted in extra moisture, which made for a somewhat soggy pancake in the areas in which the strawberries were cooked inside. "Soggy" has a horrible connotation, but it's just for a lack of a better way to describe it. I promise, they weren't THAT bad. At any rate, we never loved them enough to think about making them again.

As Michael and I talked about plans for Mother's Day, I mentioned that I'd like to get up on Sunday and make some pancakes. I hadn't made any since prior to starting our kitchen renovation, so cooking a wonderful homemade breakfast seemed long overdue.

Then, while grocery shopping on Saturday morning, I noticed that the price of strawberries had come down quite a bit, and the 2 lb. containers were full of bright red, delicious-looking strawberries. On a whim, we snagged a container, and later, it came to me: strawberry pancakes. I needed to make strawberry pancakes.

But I also needed to find a new recipe. I knew right away that I wanted to find something that incorporated strawberry puree instead of strawberry pieces, so I googled accordingly.
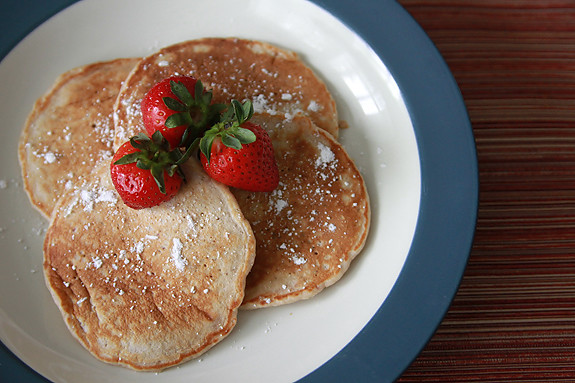

And just as I had imagined three years ago, the strawberry puree was the answer. It's difficult to tell once the pancakes are cooked to be golden brown, but the inside of the pancakes are a pretty shade of light pink. The strawberry flavor is uniformly distributed throughout each pancake to give it subtle fruity undertones. I lightly sprinkled them with powdered sugar and a slight drizzle of maple syrup and... yum.

Nora ate THREE pancakes + a boatload of fresh strawberries on the side, so needless to say, she was a huge fan, too. And she ate them completely plain, so that's a testament in and of itself. After she had polished off two, I asked her, "Are you all done?" and she vehemently shook her head. I then asked, "Do you want more?" and a huge smile spread across her face and she waved her arms and kicked her legs excitedly. When I brought her third one over to her, she literally raised her arms and made a "cheering" motion. I kid you not. With success like that, we had no choice but to declare these the pancake of choice for summer weekends.

So open those windows for some fresh air, enjoy the cool, crisp mornings, and pick yourself up some strawberries. Warm up a skillet or griddle and start the day off right. You'll thank me later.

As I often do, I doubled the original recipe to accommodate my pancake-loving girl. She loves leftover pancakes reheated in the toaster! This makes about 16 average-sized pancakes; I use approximately 1/4 cup batter for each pancake.

Strawberry Puree Pancakes
(Source: Adapted from Cin Cin, Let's Eat!)

Ingredients: 
- 2 cups flour
- 4 tbsp of granulated sugar
- 2 tsp baking powder
- 1/8 tsp salt
- 1 cup strawberry puree (made from approximately 2 cups of fresh strawberries)
- 2 eggs
- 1 to 1 & 1/2 cups milk
- 2 tbsp melted butter, more for cooking

Directions: 
1. Mix dry ingredients together in a bowl: flour, baking powder, sugar, and salt.

2. Lightly beat the egg in a separate bowl. Add in 1/2 cup of milk, strawberry puree, then melted butter. Mix well.

3. Add the wet ingredients to the dry, whisk to get all the lumps out. Add more milk if the batter is too dry and lumpy. (Note: I only needed the 1 cup of milk. Add more only if you need to thin out your batter.)

4. Heat the griddle or skillet over medium heat, grease with a dab of butter or cooking spray, then cook away. Scoop 1/4 cup of batter for each pancake.

5. Serve with powdered sugar, honey, or a little syrup.

Read more...

Gingerbread Pancakes

Saturday, December 17, 2011

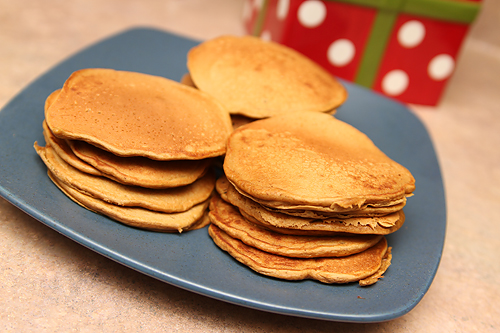
It has been several weeks since I've made pancakes on the weekend, so I was due. But instead of going with one of our standby favorites (like pumpkin or cinnamon), I thought I'd channel the Christmas spirit and make gingerbread pancakes. Sadly, though, I didn't have a recipe saved from any of my favorite resources, so I had to seek out one on my own. After a quick Google search, I ended up choosing a well-reviewed recipe from allrecipes.com.


The first thing I noticed was that the batter was thinner compared to other pancake recipes I've made. I could've thickened it up by adding a bit more flour, but I decided to stay the course and follow the recipe as is. Although they fluffed up a little bit, they are not the big, thick, hearty pancakes that you get with some other recipes. But overall, they were good, with a nice gingerbread flavor. When I first tasted one, I wasn't sure if Nora would like it because of that tell-tale gingerbread "spice" to them, but I should've given her more credit. Girlfriend eats pancakes like her job, and we're learning that she does not discriminate--ALL pancakes are welcome in her world.

Because I am partial to thick, fluffy pancakes, I might try a different recipe next time, but I would most certainly come back to this one in the future. If you're looking for a basic gingerbread pancake recipe, give this one a try.

Gingerbread Pancakes
(Source: Adapted from allrecipes.com)

Ingredients:
- 3 cups all-purpose flour
- 6 tsp. baking powder
- 3 tsp. unsweetened cocoa powder
- 1 1/2 tsp. ground ginger
- 3/4 tsp. ground cinnamon
- 3/4 tsp. ground cloves
- 6 tbsp. ground hazelnuts (optional, I omitted)
- 3 cups milk
- 3 whole eggs (or 6 egg whites)
- 6 tbsp. dark molasses

Directions:
1. In a large bowl sift together the flour, baking powder, cocoa, ginger, cinnamon and cloves; stir in hazelnuts. Set aside.

2. In a medium bowl whisk together milk, eggs and molasses.

3. Make a well in the dry ingredients and pour wet ingredients into it. Stir just enough to moisten; batter will be lumpy.

4. Heat a lightly oiled griddle or frying pan over medium high heat. Pour or scoop the batter onto the griddle, using approximately 1/4 cup for each pancake. Brown on both sides and serve hot.

Read more...

Apple Cider Pancakes

Saturday, October 1, 2011

This is one of those recipes that has been spreading around Pinterest like wildfire.

In an effort to inject some sort of normalcy back into our lives, we've dedicated one weekend morning to making pancakes the past few weeks. Last week, we busted out pumpkin pancakes. And let me tell you--those are still my favorite, and Nora LOVED them. I still highly recommend.

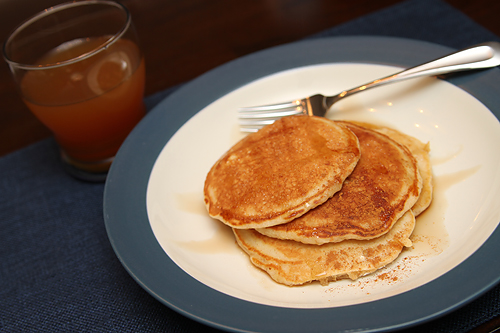
But, when I saw this recipe for apple cider pancakes, I knew that we had to give these a shot, too. It's a cold and rainy fall weekend in these parts, and we woke up Saturday morning with a plan to make a nice, hot breakfast.

And, well, these were good. But in my opinion, they weren't GREAT. Would I make them again? I guess. It's not like they tasted bad. But will I make them again? I don't know, because there are other pancake recipes I like better, and if I'm going to go through the effort, I might be more inclined to pick one of those.

A few things that contributed to this recipe's so-so review: The recipe itself is weird. I don't understand the whole "make a batch of pancake mix" thing. Why? Why do I need to have a bunch of extra pancake mix on hand (that I now need to store separately from everything else)? When writing a recipe, why not just provide the measurements for exactly the amount of dry ingredients I need to make it? We like to have extras on hand (we refrigerate and/or freeze the leftovers and pop them in the toaster for easy breakfasts), so after making the pancake mix, I tripled the ingredients for the remainder of the recipe (in other words, I used 3 cups of pancake mix, and 3x the amount of everything else, too). After that, it made what I would consider to be a standard amount of pancakes, but I still had a lot of pancake mix leftover. Annoying.

In addition to the weird pancake mix part, the recipe was sort of a pain in the ass. Separate the eggs? Whyyyy? I'm sure there's probably some culinary reason to do so, but damn. There were so many steps and dishes and... blahhhh. I just wanted to make the batter and make the damn pancakes, you know?

As far as the finished product is concerned, I just couldn't taste enough apple cider to make these things worth my while. There was also a somewhat tangy aftertaste that I attribute to the yogurt. In the end, these weren't a winner in my book. Which sucks, because the photos on Pinterest made them look oh.so.fabulous. On a side note, I do like this woman's blog, so at least I was able to "discover" her through these pancakes. Look at that, a shiny bright side! :)

Apple Cider Pancakes
(Source: Tokyo Terrace)

*This recipe makes a large batch. If you are making these for 2 or 3 people, just save the extra dry mix as I’ve indicated below. This way you’ll have plenty for the next time you decide to make pancakes! If you’d prefer not to use whole wheat flour, use white flour instead.

Pancake Mix:
- 3 cups whole wheat flour
- 3 cups white flour
- 1 1/2 teaspoons baking soda
- 3 teaspoons baking powder
- 1 tablespoon salt

Place ingredients in an airtight container and store until ready to use. Or continue with the recipe below, which makes  nice amount of pancakes for 2 very hungry people or 4 not so hungry people:

To make pancakes:
- 1 cups dry pancake mix
- 1 egg, separated
- 2 tablespoons olive oil
- 1/4 cup buttermilk (or buttermilk substitute)
- 1/4 cup plain yogurt
- 1 teaspoons honey
- 1/2 cup apple cider (or apple juice if you can’t find cider)
- Unsalted Butter (both for cooking the pancakes and topping them when they are finished)
- 3 Tablespoons sugar + 1 1/2 Tablespoons ground cinnamon

Place the 1 cup of dry mix in a large bowl. In a small bowl, whisk the egg white, buttermilk, yogurt, honey and cider. In another small bowl, whisk together the egg yolks and olive oil. Whisk the wet ingredients in one bowl until combined. Pour the wet ingredients into the bowl with the dry mix and stir until just combined. Lumps are good! Don’t get rid of them!

Heat 1 tablespoon of butter or vegetable oil in a medium pan. Measure 1/3 cup of the batter and pour into the pan. When you start to see small bubbles on the top of the pancakes and the edges are beginning to cook, flip the pancake. Be sure to add more butter or oil as needed so the pancakes don’t stick.

While the pancakes are still warm, top with some butter and allow it to melt over the top of the pancakes. Sprinkle with the cinnamon and sugar mixture and eat!

Read more...

Low-Fat Blueberry Muffins

Thursday, September 2, 2010

Back in July, when blueberries were on sale every week at the grocery store, we bought up a few extra pints and froze the blueberries for future use. Then, we went to the Poconos and picked a bunch of wild blueberries, and were able to bring a bag full of those home, too. Again, we popped them into the freezer.


I've been thinking about blueberry muffins ever since.

So in my nesting fury last weekend, in which I went about making and freezing enough food to completely fill our freezer, I decided that one of the things that just HAD to be made was a batch of blueberry muffins.
There are some baked goods that I don't think you can "skimp" on. You either have to do things right (in other words, use REAL BUTTER and OIL and all things bad for you), or don't do them at all. But when it comes to muffins, quick breads, and the like, I almost always hunt for highly-rated "healthier" versions.

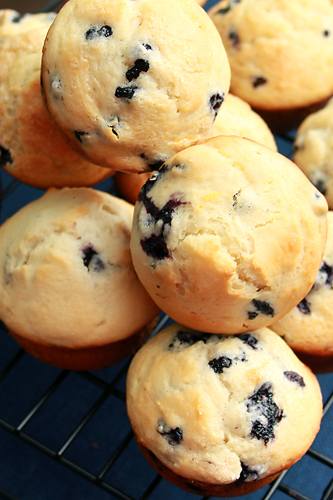
The same is true with these blueberry muffins. From America's Test Kitchen, these are made with low-fat yogurt, and upon taste testing, we were quite pleased with them. It wasn't a full-fat bakery muffin, for sure, but the tartness of the blueberries stood out, and the muffin itself was just a little bit sweet. For some reason, mine came out looking NOTHING like the ones on How to Eat a Cupcake, but I'd call these a success nonetheless. We'll be pulling these out of the freezer when we need a little nourishment. And after the baby's born, who knows, that could very well be at 3 a.m. :)

Light Blueberry Muffins
(Source: The America's Test Kitchen Family Baking Book, as seen on How to Eat a Cupcake)

Ingredients:
- Vegetable oil spray
- 2 cups (10 oz) plus 1 tablespoon all-purpose flour
- 1 cup (4 oz) cake flour
- 1 cup (7 oz) sugar, plus 1 tablespoon for sprinkling - if you have it, use coarse sugar for sprinkling
- 1 tablespoon baking powder
- 1/2 teaspoon baking soda
- 1/2 teaspoon salt
- 4 tablespoons (1/2 stick) unsalted butter, softened
- 2 large eggs
- 2 teaspoons fresh lemon Juice
- 1 teaspoon grated fresh lemon zest
- 1 teaspoon vanilla extract
- 1 1/2 cups plain low-fat yogurt (Use low-fat yogurt here; nonfat yogurt will make dry, tasteless muffins)
- 2 cups fresh or frozen blueberries (ATK prefers frozen wild blueberries)

Directions:
1. Adjust an oven rack to the middle position and heat the oven to 375 degrees. Spray a 12-cup muffin tin with vegetable oil spray.

2. Whisk 2 cups of the all-purpose flour, cake flour, 1/4 cup of the sugar, baking powder, baking soda, and salt together in a medium bowl. In a large bowl, beat 3/4 cup more sugar and butter together with an electric mixer on medium speed until light and fluffy, 3 to 6 minutes. Beat in the eggs, one at a time, until combined, about 30 seconds. Beat in the lemon juice, lemon zest, and vanilla until incorporated, scraping down the bowl and beaters as needed.

3. Reduce the mixer speed to low. Beat in one-third of the flour mixture and half of the yogurt. Repeat with half of the remaining flour mixture and the remaining yogurt. Beat in the remaining flour mixture until just incorporated. Do not overmix.

4. Toss the blueberries with the remaining tablespoon of all-purpose flour, then gently fold them into the batter with a rubber spatula. Using a 1/3-cup measuring cup sprayed with vegetable oil spray, portion the batter into each muffin cup, then portion any remaining batter evenly among the cups using a small spoon (cups will be almost completely full). Sprinkle the tops with the remaining tablespoon sugar. Bake until golden and a toothpick inserted in the center of a muffin comes out with just a few crumbs attached, 25 to 30 minutes, rotating the pan halfway through baking.

5. Let the muffins cool in the pan for 5 minutes, then flip out onto a wire rack and let cool for 10 minutes before serving.

Read more...

Blueberry Pancakes

Sunday, June 27, 2010

For about 50 weeks out of the year, fresh blueberries are too expensive for me to consider buying in a grocery store. But there comes a time, every summer, when blueberries suddenly drop in price and you can snatch them up. And then... well, then you have to figure out how you're going to use up all of those berries.

Yesterday, we spent the entire day tackling a really long "to-do" list I had crafted for us. We spent the biggest chunk of time putting together nursery furniture, and after all that work, we wanted a dinner that required very little effort.

Enter breakfast for dinner.

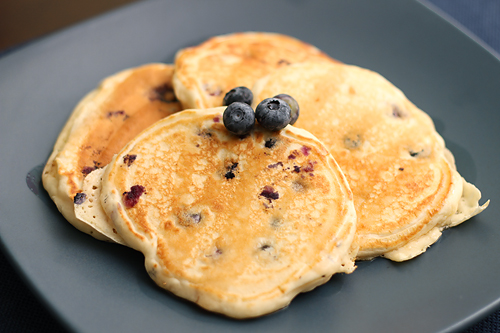
And given that we had multiple pints of blueberries sitting in the fridge, it just made sense to do blueberry pancakes.


These are light and fluffy and generally wonderful. Everything you'd expect out of a pancake. Of course, the blueberries give them the bulk of their flavor, so if you have good berries, it makes sense you'd have good pancakes!

The recipe is from Allrecipes.com, but as always, I adapted it to make more pancakes. Extra pancakes are just too good not to have around! (And I'll mention again--the best way to reheat leftover pancakes is in the toaster.)

Blueberry Pancakes
(Source: Adapted from Allrecipes.com)

Ingredients:
- 2 1/2 cups all-purpose flour
- 1 tsp. salt
- 2 tbsp. baking powder
- 2 1/2 tsp. white sugar
- 2 eggs
- 2 cups milk
- 1 tbsp. butter, melted
- 1 to 1 1/2 cups blueberries (add more or less, depending on preference)

Directions:
1. In a large bowl, sift together flour, salt, baking powder and sugar.

2. In a small bowl, beat together egg and milk. Stir milk and egg into flour mixture.

3. Mix in the butter and fold in the blueberries.
Set aside for one hour (not necessary, but whatever floats your boat!).

4. Heat a lightly oiled griddle or frying pan over medium high heat. Pour or scoop the batter onto the griddle, using approximately 1/4 cup for each pancake. Brown on both sides and serve hot.

Read more...

Cinnamon Sugar Biscotti

Friday, March 26, 2010

After the chocolate biscotti came together really easily and was successfully baking in the oven, I decided it was safe to take on a second flavor in one night. I have a lot of coworkers, so I wanted to make sure that there was a decent amount of biscotti to go around.

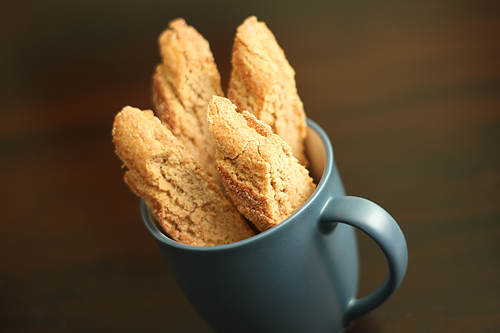
For batch #2, I turned to something completely different--cinnamon sugar biscotti. Cinnamon sugar anything just might be my favorite in the whole wide world. I'm just sayin'.


And these were a cinnamon sugar hit. Hello, gorgeous. Crunchy, sweet, spicy--perfection.

This morning, I walked into my office armed with dozens of biscotti cookies. As the new girl, I aimed to please. And let's just say...

I came.
I saw.
I conquered.

Things I learned during this baking venture:
  1. Biscotti is really easy to make. It requires a lot of baking time when compared to other "cookies," but the dough comes together quickly and there is not any part of the process that is hard.
  2. Biscotti is apparently impressive. People could not believe that I made it at home. Sometimes, I confessed to how easy it is; other times, I continued to let them be impressed. :) A girl can't reveal all of her secrets!
  3. My coworkers love biscotti. Rumors spread that there was biscotti in the kitchen before I could even get them all laid out on the plates. After I sent out an e-mail, there was a mad rush to the kitchen. Well before lunchtime, all that remained of the biscotti? Crumbs. Lots and lots of crumbs. Which leads me to my last point...
  4. Biscotti is MESSY. Crunchy = crumbly. Be prepared to get crumbs everywhere! It's worth it, though, and shouldn't be a problem unless you don't own a vacuum cleaner. Or a broom.
Both the chocolate and cinnamon sugar flavors were awesome, but in different ways. I highly recommend that you choose one (or both) and make these for someone very, very soon. You'll knock their socks off!

Cinnamon Sugar Biscotti
(Source: Joy the Baker)

Ingredients:
- 2 cups flour
- 1 1/2 teaspoons ground cinnamon
- 1 teaspoon baking powder
- 1/4 teaspoon salt
- 1 cup granulated sugar
- 6 Tablespoons (3/4 stick) unsalted butter, at room temperature
- 1 egg
- 1 egg yolk
- 1 teaspoon vanilla

For topping:
- 1/4 cup granulated sugar
- 1 teaspoon ground cinnamon
- 1 beaten egg (for brushing biscotti before baking) - I just used the egg white discarded from using the extra egg yolk in the biscotti dough. No sense in wasting another egg!

Directions:
1. Preheat oven to 325 degrees F and arrange two baking racks in the upper portion of the oven. Line two baking sheets with parchment paper and set aside.

2. In a medium bowl, whisk together flour, cinnamon, baking powder and salt. Set aside.

3. In a small bowl, also whisk together the cinnamon and sugar for the topping and set aside.

4. In the bowl of a stand mixer, fit with a paddle attachment, cream the butter and sugar until light and fluffy, about 4 minutes. Scrape down the down and beat in the egg followed by the egg yolk. Beat in the vanilla extract.

5. Add the dry ingredients to the creamed butter all at once. With the mixer or just with a spatula, bring all of the ingredients together until a somewhat stiff dough is formed.

6. Divide the dough in two on the two making sheets. Shape each half of dough into a 9-inch long and 1 1/2-inch wide log. Brush with the beaten egg and sprinkle very generously with cinnamon sugar. Bake the two sheets on two different racks in the oven for 20 minutes. Rotate the cookie sheets for even baking and bake for 20-25 more minutes until golden and firm to the touch.

7. Remove from the oven but keep the oven on. Let biscotti cool until able to handle. Using a serrated knife, cut logs into 1/2-inch wide diagonal slices. Place biscotti cut side down on baking sheet and sprinkle with more cinnamon sugar. Bake again until pale golden, about 10-15 minutes.

8. Store in an airtight container for up to one week.

Read more...

Chocolate Biscotti

Thursday, March 25, 2010

I'm almost done with my second week at my new job, and today I realized that I have yet to introduce any of my new coworkers to my tasty treats.

I rarely baked for my coworkers at my old job, because everyone was too good--no one would eat it. Plus, my office was pretty small and there weren't many people, so even a single batch of cookies was too much to bring.

My new company is a completely different story; I discovered this last week, on St. Patrick's Day. I was meeting with a coworker in a common area of the office when someone came in to announce that there were clover-shaped cookies in the kitchen. People ran, y'all. When I went into the kitchen a while later, it looked like the cookie platter had been raked over by a pack of wolves. And so I knew: These people like to eat.

I've had a few biscotti recipes bookmarked for quite some time. I've been intending to try them, as I've never made biscotti before, but it's rare that I bake up breakfast treats, so I haven't had much opportunity to make them. But as I took a few minutes earlier today to brainstorm about what I could bring my new coworkers, I quickly settled on biscotti--two different kinds of biscotti. Oh yeah, baby: Go big or go home.


First up is this chocolate biscotti from Dorie. That's right; I got to bust out the Baking Bible!

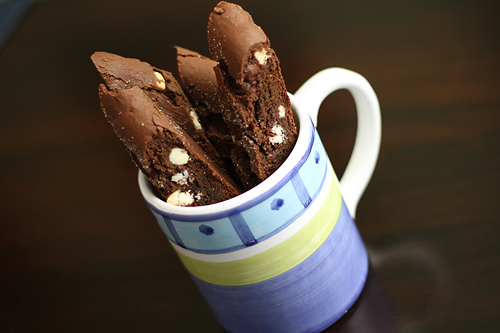
Instead of making them exactly as the recipe calls for, I tried a variation that I saw posted at Proceed With Caution, which substituted white chocolate chips for the almonds. Yum.

This biscotti has wonderful chocolate flavor, and although I thought the white chocolate chips were a bit overpowered by the cocoa, they still added just a little extra something that made these so perfect. Delectably crunchy... there is no doubt my coworkers will love them!

Chocolate Biscotti
(Source: Baking: From My Home to Yours by Dorie Greenspan)

Ingredients:
- 2 cups all-purpose flour
- 1/2 cup unsweetened cocoa powder
- 2 tablespoons instant espresso powder (I replaced with additional cocoa powder)
- 3/4 teaspoon baking soda
- 1/2 teaspoon baking powder
- 1 teaspoon salt
- 3/4 stick (6 tablespoons) unsalted butter, at room temperature
- 1 cup sugar
- 2 large eggs, lightly beaten
- 1 teaspoon pure vanilla extract
- 1 cup chopped almonds, blanched or unblanched (or about 4 ounces white chocolate chips)
- 4 ounces bittersweet chocolate, coarsely chopped, or 3/4 cup store-bought mini chocolate chips (I only had regular-sized chocolate chips, so I chopped them up so they were smaller)
- Sugar, for dusting

Directions:
Center a rack in the oven and preheat the oven to 350 degrees F. Line a baking sheet with parchment or a silicone mat.

Sift together the flour, cocoa, espresso powder, baking soda, baking powder and salt.

Working with a stand mixer, preferably fitted with a paddle attachment, or with a hand mixer in a large bowl, beat the butter and sugar together on medium speed until pale, about 2 minutes; the mixture may be crumbly. Scrape down the sides of the bowl, add the eggs and vanilla and beat for another 2 minutes; don’t worry if the mixture looks curdled. Reduce the mixer speed to low and mix in the dry ingredients in 3 additions, mixing only until a dough forms. Scrape down the sides of the bowl. Mix in the chopped nuts and chocolate, then turn the dough out onto a work surface and knead in any dry ingredients that might have escaped mixing.

Divide the dough in half. Working with one half at a time, roll the dough into 12-inch-long logs. Flatten both logs with the palm of your hand, so that they are 1/2 to 1 inch high, about 2 inches across and sort of rectangular, then carefully lift the logs onto the baking sheet. Sprinkle each log with a little sugar.

Bake the logs for about 25 minutes, or until they are just slightly firm. The logs will spread and crack--and that’s just fine. Remove the baking sheet from the oven, put it on a cooling rack and cool the logs for about 20 minutes. (Leave the oven on.)

Working with one log at a time, using a long serrated knife, cut each log into slices between 1/2 and 3/4 inch thick. Stand the slices up on the baking sheet--you’ll have an army of biscotti--and bake the cookies again, this time for just 10 minutes.

Transfer the biscotti to a rack to cool.

Read more...

Cinnamon Pancakes

Friday, February 19, 2010

Now that lent is upon us, the challenge of coming up with meatless dinners has begun. Thankfully, one of my favorites--breakfast for dinner--is usually meatless for us. Because my favorite breakfast for dinner dish? PANCAKES.

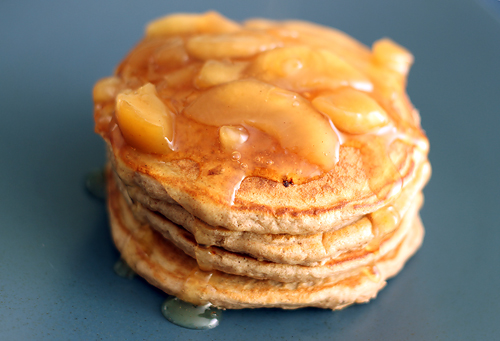
We had a can of apple pie filling in the cupboard, and I figured we'd cook up some plain pancakes and top them with the apples. However, I got to thinking... instead of plain pancakes, why not make pancakes with a complementary flavor for the apples? And of course, the next thought: cinnamon.

Because I mean... DUH.


I googled and found a lovely looking cinnamon pancake recipe right off the bat. We gave them a try and they are wonderful! They are fluffy, and have a great cinnamon flavor. They tasted fantastic with the apples, but were wonderful with just a little bit of maple syrup, too. We'll certainly be making these again very soon.

I doubled the original recipe because let's face it... six pancakes is just NOT enough. Also, I've found that leftover pancakes are really good if you pop them in the toaster to reheat, so I knew we wouldn't have a problem with a few extras. We got about 15 pancakes out of the recipe, but obviously it'll depend on the size of your pancakes!

Cinnamon Pancakes
(Source: Adapted from Sugarlaws)

Ingredients:
- 1 & 3/4 cups milk
- 2 cups plus 4 tbsp. all-purpose flour
- 4 tsp. baking powder
- 1/2 tsp. salt
- 4 tsp. ground cinnamon
- 4 tbsp. sugar
- 2 egg
- 2 tbsp. butter, melted

Directions:
1. Combine all the ingredients in a large mixing bowl. Beat until smooth.

2. Heat a frying pan or skillet on the stovetop. (Or use your electric griddle, if you have one!) Spray with cooking spray or grease with a little extra butter. Ladle out 1/4 cup of pancake batter at a time, and cook about 1 min on each side, flipping each pancake midway through.

3. Serve with maple syrup, honey, apple pie filling, or extra butter.

Read more...

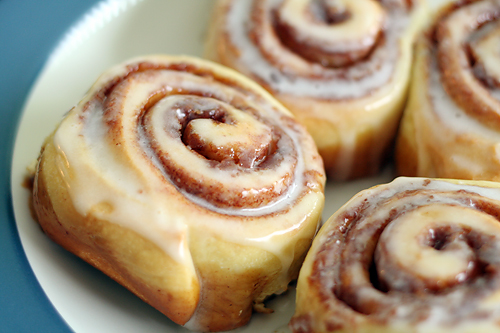
Overnight Cinnamon Rolls

Saturday, January 2, 2010

I have been wanting to try to make homemade cinnamon rolls for about a year now. No joke. It's just that they require quite a bit of advanced preparation, so you have to plan ahead. Because of all that prep, they're also a bit time-consuming, so it's hard to muster up the motivation to make these. And then we're just not that all into breakfast in this house. While we love breakfast foods, most mornings we prefer simple cereal.

But as Christmas was approaching, I decided that I'd make cinnamon rolls--not once, but twice. Once on Christmas morning for our big breakfast with my family, and then again the day after that for a brunch at Michael's sister's house. I bought all the ingredients, read through the recipe to prepare myself, and then... well, it didn't work out. I didn't make them for Christmas morning, and I didn't make them for brunch the following day, either. There was just too much going on and not enough time to devote to these cinnamon rolls.


So when we had my sister-in-law (home on holiday break from college) come over to hang out with us and spend the night earlier this week, I knew that I just had to make cinnamon rolls for the three of us to enjoy in the morning.

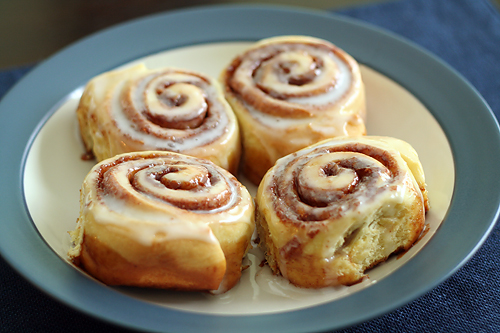
I had never attempted homemade cinnamon rolls before, so this was all new to me. And I'm always worried about working with yeast, so this was kind of challenging! But it all worked out in the end. The cinnamon rolls? Absolutely amazing. The only thing left to figure out is when we'll have the opportunity to make these again!

Overnight Cinnamon Rolls
(Source: Confections of a Foodie Bride, adapted from Food Network)

Yields 12 rolls

Ingredients:
Dough:
- 4 large egg yolks, room temp
- 1 large whole egg, room temp
- 1/4 cup sugar
- 6 tbsp. unsalted butter, melted
- 3/4 cup buttermilk, room temp
- 20 oz all-purpose flour (approximately 4 cups), plus additional for dusting
- 1 pkg (2 1/4 tsp) instant dry yeast
- 1 1/4 tsp kosher salt
- Vegetable oil or cooking spray

Filling:
- 1 1/4 cup light brown sugar, packed
- 1 1/4 tbsp. ground cinnamon
- pinch salt
- 2 tbsp. unsalted butter, melted

Icing:
2-3 tbsp. milk
1 cup powdered sugar

Directions:
1. For the dough: in the bowl of a stand mixer with the whisk attachment, whisk the egg yolks, whole egg, sugar, butter, and buttermilk. Add approximately 2 cups of the flour along with the yeast and salt; whisk until moistened and combined.

2. Remove the whisk attachment and replace with a dough hook. Add all but 3/4 cup of the remaining flour and knead on low speed for 5 minutes. Check the consistency of the dough, add more flour if necessary; the dough should feel soft and moist but not sticky. Knead on low speed 5 minutes more or until the dough clears the sides of the bowl.

3. Turn the dough out onto a lightly floured work surface; knead by hand about 30 seconds. Lightly oil a large bowl. Transfer the dough to the bowl, lightly oil the top of the dough, cover and let double in volume, 2 to 2 1/2 hours.

4. For the filling: Combine the brown sugar, cinnamon and salt in a medium bowl. Mix until well incorporated. Set aside until ready to use.

5. To assemble: Butter a 9 by 13-inch glass baking dish. Turn the dough out onto a lightly floured work surface. Gently shape the dough into a rectangle with the long side nearest you. Roll into an 18 by 12-inch rectangle.

6. Brush the dough with the 3/4-ounce of melted butter, leaving 1/2-inch border along the top edge. Sprinkle the filling mixture over the dough, leaving a 3/4-inch border along the top edge; gently press the filling into the dough.

7. Beginning with the long edge nearest you, roll the dough into a tight cylinder. Firmly pinch the seam to seal and roll the cylinder seam side down. Very gently squeeze the cylinder to create even thickness.

8. Using a serrated knife, slice the cylinder into 1 1/2-inch rolls; yielding 12 rolls. Arrange rolls cut side down in the baking dish; cover tightly with plastic wrap and store in the refrigerator overnight or up to 16 hours.

9. Remove the rolls from the refrigerator and place in an oven that is turned off. Fill a shallow pan 2/3-full of boiling water and set on the rack below the rolls. Close the oven door and let the rolls rise until they look slightly puffy; approximately 30 minutes. Remove the rolls and the shallow pan of water from the oven.

10. Preheat the oven to 350 degrees.

11. When the oven is ready, place the rolls on the middle rack and bake until golden brown, or until the internal temperature reaches 190 degrees on an instant-read thermometer, approximately 25-30 minutes.

12. While the rolls are cooling slightly, make the icing by whisking the milk and powdered sugar until smooth. Spread over the rolls and serve immediately.

Read more...

Pumpkin Scones

Sunday, December 27, 2009

For our family brunch yesterday, I needed to bring something that could be prepared ahead of time but would travel well. I decided that scones would be perfect because I could make them the night before, freeze them, and they would be ready to go right into the oven when we arrived at Michael's sister's house.

I have come across a lot of scone recipes that I want to try, but chose these simply because I had some pumpkin puree in the refrigerator that I had to use up.

I've seen a couple of variations of these pumpkin scones from Joy of Baking, but decided to go with Annie's version. The only thing I did differently was to cut the dough into the scone wedges prior to baking, instead of afterward. I've made that change in the instructions below. Oh, and I didn't bother with the glaze, but I've left that information in the recipe in case you'd like to use it. I will say that I don't think the scones needed it... they were great by themselves!


These had the perfect amount of pumpkin flavor, and were nice and fluffy. The butterscotch chips were an awesome addition and really made the scone, in my opinion.

Pumpkin Scones
(Source: Annie's Eats, adapted from Joy of Baking)

Ingredients:
For the scones:
- 2 cups all-purpose flour
- 1/3 cup packed brown sugar
- 1/2 tsp. ground ginger
- 1/2 tsp. ground cinnamon
- 1 tsp. baking powder
- 1/2 tsp. baking soda
- 1/4 tsp. salt
- 8 tbsp. cold, unsalted butter, cut into pieces
- 1/3-1/2 cup butterscotch chips (or white chocolate or cinnamon chips, if you prefer)
- 1/2 cup buttermilk
- 1/2 cup pumpkin puree
- 1 tsp. vanilla extract

For the glaze:
- 1 cup powdered sugar
- 1/4 tsp. ground cinnamon
- Dash of ground nutmeg
- Dash of ground ginger
- Dash of ground cloves
- 2 tbsp. milk

Directions:
1. Preheat the oven to 400 degrees. Line a baking sheet with parchment paper or a silicone baking mat.

2. In a medium mixing bowl, combine the flour, brown sugar, spices, baking powder, baking soda and salt; whisk just to combine.

3. Add the cold butter chunks to the bowl and stir with a fork to combine. Cut the butter into the dry ingredients until the mixture resembles coarse crumbs and the largest butter pieces are no bigger than peas. Mix in the butterscotch chips.

4. In a small bowl or measuring cup, combine the buttermilk, pumpkin puree and vanilla extract. Add the wet ingredients to the bowl with the dry ingredients and stir together gently just until the dough comes together. If necessary, knead a bit with your hands, but be careful not to overwork the dough or you will end up with a tough scone. (You may have to add more flour here; I did. The dough was simply too sticky to even handle with my hands. You want it to be somewhat sticky, but you should be able to knead it/form the round without too much of it sticking to your hands! Just add the flour a little bit at a time and work it in, trying not to overwork the dough in the process. I had to work with mine quite a bit and my scones still turned out just fine!)

5. Transfer the sticky mass of dough to a lightly floured surface. Pat the dough into a 8 or 9-inch round. Cut the dough into 8 wedges. Arrange wedges on a baking sheet, leaving an inch or two between each one. Bake immediately, or you can freeze for later use. Bake until a toothpick inserted in the center comes out clean, about 22-25 minutes (may need to bake longer for frozen scones). If you are omitting the glaze, you can serve while warm (which I highly recommend!).

6. If you will be drizzling with the glaze, allow to cool to room temperature. To make the glaze, combine the powdered sugar and spices in a small bowl. Add the milk and whisk to combine, until a thick glaze is formed. (If necessary, add a bit more milk to achieve a consistency good for drizzling the glaze.) Use a whisk to drizzle the glaze over the finished scones (or use a plastic baggie with a tip cut off). Allow the glaze to set before serving.

Read more...

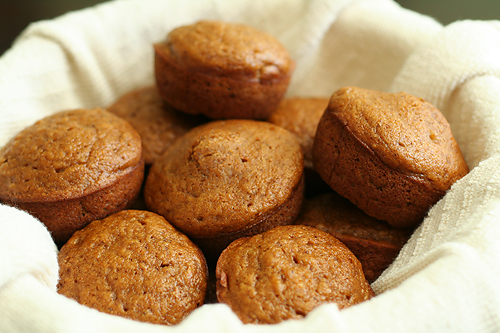
Low-Fat Pumpkin Muffins

Monday, October 12, 2009

On Saturday, we went to visit my cousin and her brand-new baby girl. I wanted to bring her food, in the form of baked goods that could easily be frozen. I didn't think she'd appreciate me bringing a bunch of junk food into the house, so I decided to bake for her like I'd want someone to bake for me--in a manner that is low-fat, but delicious.

I started by making her a loaf of low-fat zucchini bread, which is a tried and true favorite. But given that it's fall and all, I wanted to make something pumpkin, too. Pumpkin bread immediately came to mind. I have a KILLER pumpkin bread recipe that has been in my family for years, but the amount of oil and sugar used in it is ridiculous. Of course, it's wonderful because of that, but I haven't even made it in several years because I'm afraid of what it'd do to my hips. Instead, I hit Google to try to find a healthier alternative.

img 001rs by you.
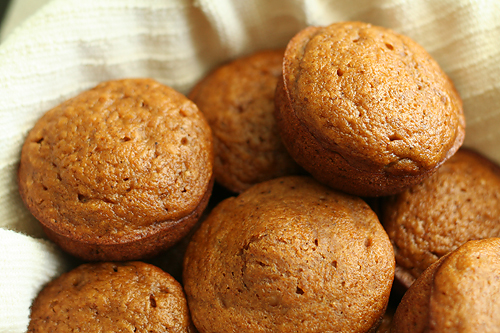
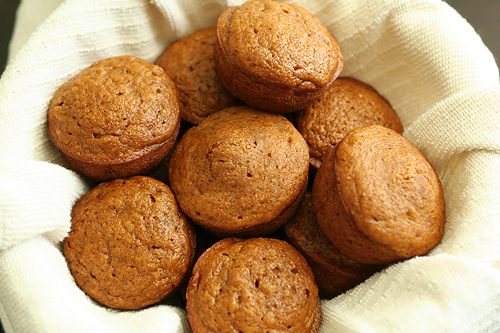
I ultimately decided to bake the batter in muffin pans instead of bread pans (just for something different), and it baked up a lot more quickly as a result, which was nice. The end result was really flavorful, and is perfect for fall. My only nitpicky complaint was that they were slightly chewy, but that is to be expected with low-fat baked goods. I think it's important to note that I've often found that sweet breads like this actually taste better and have better texture if you let them sit for a day/overnight before eating them. Since I was taking these to my cousin's, I didn't have the opportunity to do that, but I'll be trying that next time! I'm sure I'll see an improvement in the chewiness department.

Anyway, if you're in the mood for pumpkin goodies without the guilt, give these guys a try!
img 012rs by you.
Low-Fat Pumpkin Muffins
(Source: Adapted from About.com)

Ingredients:
- 1 cup canned pumpkin
- 1/2 cup applesauce (no sugar added)
- 1 1/4 cups sugar
- 1/2 cup water
- 2 eggs
- 1 2/3 cups flour
- 1/2 tsp. baking powder
- 1 tsp. baking soda
- 1 tbsp. cinnamon
- 1/2 tsp. nutmeg
- 1/4 tsp. ginger
- 1/4 tsp. cloves
- 1/2 tsp. salt

Directions:
1. Pre-heat oven to 350 degrees. Spray your muffin cups with cooking spray.

2. In the bowl of your electric mixer (or you can whisk by hand), mix together the sugar, pumpkin, applesauce, water and eggs and set aside. In a separate bowl, combine the remaining dry ingredients.

3. Slowly add the dry ingredients to the wet ingredients, stirring well to combine. Spoon into prepared muffin cups, filling about 2/3 full. Sprinkle a bit of extra sugar and spices on top if desired (optional).

4. Bake for about 20-25 minutes, or until a toothpick inserted into the pumpkin muffins comes out clean.

Makes about 16 muffins.
img 009rs by you.

Read more...

Strawberry Pancakes

Friday, May 1, 2009

I've said it before, and I'll say it again: Sometimes, you just have to have breakfast for dinner.

One night earlier this week, we made ourselves some pancakes. We could have gone with blueberry pancakes, or even the pumpkin pancakes. But we're at the beginning of strawberry season now, and we figured we might as well utilize them, especially since we love them so much.

I went on a search for a strawberry pancake recipe and came across this one by Rachael Ray. They were definitely good pancakes, and I'd make them again, but I would love to find something that maybe works the strawberries in the batter a bit more? Maybe there's a strawberry pancake recipe out there that incorporates strawberry puree? Not sure, but I might look around. For now, this is a good pancake recipe, and there are a lot of strawberries in them. They definitely hit the spot.

Strawberry Pancakes
(Source: Every Day with Rachael Ray)

Ingredients:
- 1 1/2 cups all-purpose flour
- 2 tbsp. granulated sugar
- 2 tsp. baking powder
- 1/2 tsp. salt
- 1 large egg
- 1 cup milk
- 1/2 tsp. pure vanilla extract
- 1 tbsp. unsalted butter, melted, plus more for serving
- 2 cups sliced strawberries
- Pure maple syrup, for serving

Directions:
1. In a medium bowl, whisk together the flour, sugar, baking powder and salt.

2. In a small bowl, whisk together the egg, milk and vanilla.

3. Preheat a nonstick griddle over medium heat. Whisk the wet ingredients into the dry. Stir in the melted butter. The batter should be thick and smooth. Fold in the strawberries.

4. Spoon the batter onto the griddle 1/4 cup at a time. Cook the pancakes until set and thoroughly bubbly, about 3 minutes. Flip them with a spatula and cook until golden brown, about 2 minutes more. Serve with butter and maple syrup.

Read more...

Blueberry Scones

Wednesday, April 22, 2009

Once again, I am moving offices at work.

I won't go into all of the details now, since this is a recipe post, but the bottom line is, my officemates and I are going to miss each other. Terribly. So, today, which is our last day before the big moves start happening, we threw ourselves a little going-away-from-each-other breakfast.

These ladies have been enjoying and complimenting all of my baking for the last nine months. And so, I thought it only appropriate that I make something new and fabulous with which to send them off.

Enter the blueberry scones from Katie over at Good Things Catered.

It's no secret; when I'm looking for a recipe that I really need to be good, I often turn to Katie. And since I had never made scones before, I needed a fail-proof recipe.

Well, after the fiasco I ended up having with the dough last night, I wasn't sure these were going to be fail-proof. The problem was that when made according to the directions, my dough was wayyy too sticky. Quickly, I googled "scone dough too sticky" and found some information on the Joy of Baking that talks about how different flours absorb different amounts of liquids, blah blah blah. The solution was, as I suspected, to add more flour. So I wrestled with the dough, I added more flour, I wrestled with it again, and repeated. REPEATEDLY. I ended up adding wayyy more flour (at least a 1/2 cup more) than the recipe called for, and I was sure something was not right.

And THEN I went back to the Joy of Baking site and found WARNINGS posted ALL OVER the scone recipes about not overworking the dough. Basically, DO NOT OVERWORK THE DOUGH OR YOU WILL END UP WITH RUBBERY HOCKEY PUCKS FOR SCONES.

Um, whoops. By that time, I had mixed and remixed and mixed some more due to my adding extra flour a little at a time. I was sure that my scones were doomed.

But finally, I got the dough to a point where I could actually work with it, roll it out, cut it into pieces, and transfer my scones onto a cookie sheet. Defeated, I wrapped up the pan and stuck the scones into the freezer for fresh baking in the morning.

Today was a new day. I preheated the oven while I showered, then stuck my frozen scones into the oven. And I baked them. And baked them some more. Added a few more minutes onto the timer. And another couple of minutes. And a few minutes more. (They required probably an additional 10-15 minutes of baking time since they had been frozen.)

When they were finally brown and scone-looking, I took them out of the oven, threw them into a container, snapped a few pictures (aren't they pretty?), covered them with some clean dish towels, and ran out the door to work.

The blueberry scones made their debut once I got to work. At first, my officemates just wanted to see them. And sure, they looked great, but I was still nervous about biting into one of them. Imagine my surprise when I took my first bite and... well, they were perfect.

COMPLETE success. These scones are just the right amount of "crunchy" on the outside, and light and fluffy in the middle. They have the perfect amount of sweetness, and the blueberries make them fabulous. And knowing what I know now about needing to add extra flour? These things will be a cinch next time I make them. Really. So easy.

Blueberry Scones
(Source: Good Things Catered)

Ingredients:
- 2 cups flour + 2 tbsp. + 1 tbsp. (may need additional to get dough to the correct consistency)
- 1 tbsp. baking powder
- 3 tbsp. sugar
- 1/8 tsp. salt
- 6 tbsp. butter + 1/2 tbsp., chilled
- 1 tbsp. vanilla
- 1 cup half and half, chilled
- 2/3 - 1 cup fresh or frozen blueberries

Directions:
1. Preheat oven to 425 degrees and line a baking sheet with parchment.

2. In small bowl combine frozen blueberries and 1 tbsp. flour and toss to combine. Place blueberry mixture into fridge or freezer.

3. In large bowl, combine flour, baking powder, sugar and salt.

4. Take butter out of fridge, cut into chunks and add to flour mixture. Cut butter into flour until pea sized or smaller.

5. Add vanilla and half and half and mix in with a spoon until just barely incorporated.

6. Take blueberries out of fridge or freezer and knead into mixture until mixture forms a ball of sticky dough. (It should be on the "sticky" end of the spectrum, but it needs to be solid enough that you can work with it. Add additional flour until you reach workable consistency.)

7. Turn dough out onto floured surface and pat down into rough 9-10 inch circle. Cut into 8 triangles and place triangles onto prepared baking sheet at least an inch apart. Take 1/2 Tbsp butter and cut into 8 small pieces. Place one small piece of butter on top of each scone. (At this point, you should wrap up the pan and freeze them if you aren't baking them immediately.)

8. Place in oven and bake for 15 minutes. (For frozen scones, don't defrost them, just pop into the oven and start off at 20 minutes baking time. Keep adding time, watching the scones closely, until they are a nice, golden brown and the edges look sort of crispy. I baked mine for around 30 minutes.) Serve warm.

Read more...

Pumpkin Pancakes

Sunday, January 4, 2009

There are many simple pleasures in life. Tonight, we chose to take advantage of one of my very favorite simple pleasures: Breakfast for dinner.

I've been craving breakfast foods for a few days now. Cinnamon rolls, pancakes, hashbrowns, waffles. Images of sweet foods dancing around in my head, and teasing my tastebuds. And tonight, I gave in. The perfect recipe to indulge in? Pumpkin pancakes.

A couple of nights ago, Michael and I were watching an episode of Diners, Drive-ins, and Dives on the Food Network. Guy Fieri was visiting a diner for breakfast. Consequently, I think this show is responsible for my breakfast food craving. But I digress. Anyway, one of the foods featured was a plate of pumpkin pancakes.

Truth be told, I've never made pumpkin pancakes before. In fact, I've never even had them before. I'm not sure how I've gone 26 years without them, since I love pumpkin so much, but somehow, I have.

Well, no more. I put an end to that tonight.

My first step was to find a recipe. When I'm looking for a recipe for something specific, I often turn to allrecipes.com. I like it because there are usually recipes that have been tried by many, many people, and most of the recipes have been reviewed. It's nice to pick a recipe that you know is tried and true. Also, in their reviews, people often leave tips and advice, ways they altered the recipe, etc. It's very convenient.

So anyway, it didn't take me long to find a seemingly good pumpkin pancake recipe with a 4.5 star rating, and reviewed by 490 people. After reading several reviews, I felt this was a recipe that could be trusted. Perfect for my first experience with pumpkin pancakes.

Off to the kitchen I went to cook our meal. Of course, I didn't dive in empty handed. No, sir... I brought along the camera with our cool new lens. You know, just for experimental purposes.

As it turned out, I liked the results. Of both the photography and the pancakes.

These pancakes pack a lot of pumpkin flavor, and the amount and combination of spices was perfect. Taking the advice of some of the reviews, I added an extra egg, a tablespoon of granulated sugar, and a teaspoon of vanilla extract. The pancakes were fluffy and cakey. They were actually good on their own, but I enjoyed them even more with a few drizzles of syrup. Yum.

Pumpkin Pancakes
(Source: Adapted from Allrecipes.com)

Ingredients:
- 2 cups all-purpose flour
- 3 tbsp. brown sugar
- 1 tbsp. granulated sugar
- 2 tsp. baking powder
- 1 tsp. baking soda
- 1 tsp. ground allspice
- 1 tsp. ground cinnamon
- 1/2 tsp. ground ginger
- 1/2 tsp. salt
- 1 1/2 cups milk
- 1 cup pumpkin puree
- 2 eggs
- 2 tbsp. vegetable oil
- 2 tbsp. vinegar
- 1 tsp. vanilla extract

Directions:
1. In a small bowl, mix together the milk, pumpkin, eggs, oil, vinegar, and vanilla.

2. In a separate, larger bowl, combine the flour, sugars, baking powder, baking soda, and spices.

3. Add pumpkin/milk mixture into the large bowl with the dry ingredients. Stir just until combined.

4. Heat a lightly oiled (I use nonstick spray) griddle or skillet over medium high heat. Pour or scoop batter onto the griddle, using approximately 1/4 cup batter for each pancake. Brown on both sides and serve hot.

The original recipe says it makes 12 pancakes, but I got 18 out of it, plus a small silver-dollar-sized one for Tess. :) I used a 1/4 cup measuring cup to scoop the batter onto the skillet, so they were all consistent in size. I don't know why it made so many more than it called for, but we weren't complaining!

Back to work tomorrow! Boo...

**Update: The leftovers were surprisingly good! (We usually throw out extra pancakes because leftovers don't sound appealing.) These were too good to toss, so we put all leftovers into a ziploc sandwich bag and stuck them in the fridge. Today, I popped them in the toaster, and they are nearly as good as they were the other night.

Read more...

Blueberry Crumb Cake

Friday, September 19, 2008

Tonight, I planned to make apple squares from a recipe given to me by a friend. The plan was to make them to take to my in-laws tomorrow. My sister-in-law, brother-in-law, and nephew are coming into town and I always like to bring something to share.

But when Michael talked to his sister tonight, she mentioned that she was bringing a homemade apple pie. Even though it's fall and it's apple season, I didn't want to overdo it with the apple desserts. I suspected my apple squares might have been too similar to the apple pie, so I had to scramble to find something new to make. And quickly. It was already 8:00 p.m. To further complicate things, I had to find something to make that only used ingredients we had in the house. Neither one of us felt like running out to the grocery store.

So, I picked up my new baking book and started thumbing through it. Many of the recipes that looked good were eliminated immediately due to time constraints or the contents of our cupboards. However, I eventually landed on this recipe for blueberry crumb cake. I asked my husband if he thought this might be good to bring, and he agreed. Into the kitchen I went.


Blueberry Crumb Cake
(Recipe from Baking: From My Home to Yours by Dorie Greenspan)

For the Crumbs:
5 tbsp unsalted butter at room temp
1/4 cup sugar
1/3 cup light brown sugar (packed)
1/3 cup all purpose flour
1/4 tsp salt
1/2 cup chopped walnuts*

For the Cake:
1 pint (2 cups) blueberries (preferably fresh, or frozen, not thawed)**
2 cups plus 2 tsp all purpose flour
2 tsp baking powder
1/2 tsp baking soda
1/4 tsp salt
1/4 tsp ground cinnamon
1/8 tsp freshly ground nutmeg
2/3 cup sugar
grated zest of 1/2 lemon or 1/4 orange
3/4 stick (6 tbsp) unsalted butter at room temp
2 large eggs, at room temp
1 tsp vanilla extract
1/2 cup buttermilk

Preheat oven to 350. Butter an 8-inch square pan and put it on a baking sheet.To make the crumbs: Put all the ingredients except the nuts in a food processor and pulse just until the mixture forms clumps and curds and holds together when pressed. Scrape the topping into a bowl, stir in the nuts and press a piece of plastic wrap against the surface. Refrigerate until needed. (Covered well the crumb mix can be refrigerated for up to 3 days.)

To make the cake: Using your fingertips, toss the blueberries and 2 tsp of the flour together in a small bowl just to coat the berries; set aside. Whisk together the remaining 2 cups flour, baking powder, baking soda, salt, cinnamon and nutmeg.

Working in the bowl of a stand mixer or in another large bowl, rub the sugar and zest together with your fingertips until the sugar is moist and aromatic. Add the butter and, with the paddle or whisk attachment, or with a hand mixer, beat the sugar with the butter at medium speed until light, about 3 minutes. Add the eggs one by one, beating for about 1 minute after each addition, then beat in the vanilla extract. Don’t be concerned if the batter looks curdled — it will soon smooth out. Reduce the mixer speed to low and add the flour mixture and the buttermilk alternately, the flour in 3 parts and the buttermilk in 2 (begin and end with the dry ingredients.) You will have a thick, creamy batter. With a rubber spatula, gently stir in the berries.

Scrape the batter into the buttered pan and smooth the top gently with the spatula. Pull the crumb mix from the fridge and, with your fingertips, break it into pieces. There’s no need to try to get even pieces — these are crumbs, they’re supposed to be lumpy and bumpy and every shape and size. Scatter the crumbs over the batter, pressing them down ever so slightly.

Bake for 55 to 65 minutes, or until the crumbs are golden and a thin knife inserted into the center of the cake comes out clean. Transfer the cake to a rack and cool just until it is warm or until it reaches room temperature.

*We used peanuts instead of walnuts.
**I would use more blueberries next time.

Close-up of the crumb topping:


Update and review: This came out very well. Perfect for a breakfast or brunch treat, but also sufficient for a snack or dessert. The crumb topping is really flavorful and sweet, and is a nice offset to the cake. I would have enjoyed having more blueberries in the cake, so the next time I make this, I will include at least another handful of blueberries. Since I was using frozen berries, I think they didn't measure correctly because of a little ice build-up on some of the berries. And as always, I'm sure fresh berries would be even better.

Read more...

Low-Fat Zucchini Bread

Monday, August 25, 2008

I spent the evening in the kitchen.

When I got home, I immediately started working on a cookie cake for a potluck lunch at work tomorrow. I used the excellent Thick and Chewy Chocolate Chip Cookie recipe, but spread it into a pizza pan. I baked it until it looked done and took it out. It came out pretty well, but I'd probably bake it for a little less time next time I make it.

Later on, once it cooled, I actually decorated it with buttercream frosting, using my new cake decorating skills. I would love to show a photo of it (it came out so awesome!) but I decorated it with a company logo, and I don't want the whole blogging world to know where I work. So you'll just have to imagine an extremely well decorated cookie cake in your heads! :)

On Saturday, we went to a local farm market and bought an absolutely HUGE (seriously, it's about the size of our dog) zucchini for only $0.50. I decided I should start using it, so I shredded some to use in zucchini bread. The recipe is below. The three cups needed for the recipe barely made a dent in this thing. We'll definitely be eating more zucchini this week.

Before tonight, I had never actually made zucchini bread before. I didn't have a tried and true recipe, so I adapted one I found on recipezaar.com. I made note of what I changed in the recipe below. It came out really well! It's moist and delicious, and best of all, low fat! I'm all about decreasing the guilt without decreasing the taste (when possible). Try it out!


Low-Fat Zucchini Bread
(Adapted from RecipeZaar)

Ingredients:

- 1 3/4 cups sugar
- 3 eggs
- 3 cups flour (I used 1 1/2 cups all purpose, and 1 1/2 cups whole wheat)
- 2-3 cups zucchini, grated or finely diced
- 2 tbsp. oil
- 1 cup unsweetened applesauce
- 1 teaspoon baking soda
- 1/4 teaspoon salt
- 1/4 teaspoon baking powder
- 1 tablespoon cinnamon
- 1 tablespoon vanilla

Directions:

1. Preheat oven to 350 degrees. Mix together all ingredients.
2. Pour into 2 loaf pans.
3. Bake for 45-55 minutes (until toothpick inserted in center comes out clean).

Read more...

Low-Fat Banana Bread

Saturday, July 19, 2008

I love sweet bread. Pumpkin bread, zucchini bread, apple cinnamon bread, banana bread... yum.

The only problem is that under normal circumstances, it is sooo not good for you.

Back in May, we had a few overly ripe bananas, and I wanted to use them for banana bread. Instead of using the recipe I have used for years and years, I decided to go on the internet and try to find something just a tad bit more healthy for us.

I ultimately landed on a recipe from http://www.recipezaar.com/ for "Low-Fat Banana Bread." It had several good reviews, and that seemed unusual for a low-fat bread recipe. I decided to give it a try.

The first time I sampled it, I tried it pretty much right out of the oven. I didn't like it. It was chewy, and I wasn't that thrilled about the taste of it, either. Well, I should have known. Sweet bread is ALWAYS better after you let it sit for a while. I tried it again the next day, and I was blown away. To me, it does not taste low fat at ALL. It's moist, has a good texture, and has a really nice banana flavor. Delicious. I have made it at least four times since then.

Yesterday, I decided to throw a loaf in the oven for a party my mom was hosting last night. That's the thing about this bread--perfect for breakfast, a snack, or dessert.

At the party? Rave banana bread reviews. I don't think anyone even suspected it wasn't full-on, full-fat banana bread. Two thumbs (or, it would probably be more accurate to say approximately 20 thumbs) up for this recipe. So go ahead, give it a whirl.

This recipe makes one good-sized loaf. I often double the recipe to make two loaves. Lots of bananas--but so good!

Low-Fat Banana Bread

- 4 bananas (the more ripe, the better)
- 1 1/2 cups all-purpose flour
- 1 cup white sugar (you can lessen this a bit and still not affect the taste)
- 2 tbsp. butter, softened (I use low-fat margarine)
- 1 tsp. vanilla extract
- 1 tsp. baking soda
- 1/2 tsp. baking powder
- 1 egg
- 2 tbsp. unsweetened applesauce

1. Peel bananas and mash them in a bowl. (I break them in thirds, throw them into a bowl, and beat them with my Kitchen Aid mixer.)

2. Add all other ingredients and mix well.

3. Pour into a greased loaf pan.

4. Bake at 350 degrees for 50-60 minutes, until toothpick inserted into center of loaf comes out clean.

Good eats. Enjoy!

Nutrition Facts: Recipe makes 12 servings; Serving size- 1 slice; Calories- 182; Calories from fat- 23; Total fat- 2.6g; Saturated fat- 1.4g; Monounsaturated fat- 0.7g; Polyunsaturated fat- 0.2g; Trans fat- 0.0g; Cholesterol- 22mg; Sodium- 140mg; Potassium- 166mg; Total carbohydrate- 38.2g; Dietary fiber- 1.5g; Sugars- 21.6g; Protein- 2.6g

Read more...

  © Blogger template On The Road by Ourblogtemplates.com 2009

Back to TOP