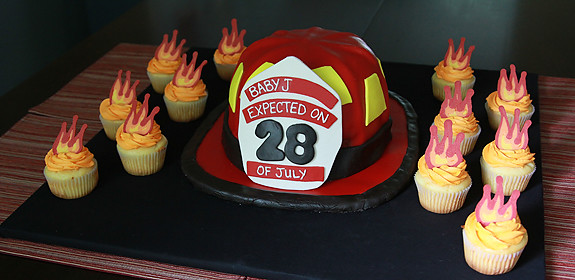
Fire Helmet Cake
Wednesday, June 20, 2012
Oh, this cake. It gave me so much grief.
My brother and his wife: They're having a baby. A baby boy, due next month. A few months back, Marie's mom and sisters started planning her shower, and asked me to make a cake. Of course, I said yes--first of all, because it's for my brother and sister-in-law (so... duh), and secondly, because I do enjoy a good motivator to get me back into the kitchen to bake and do my thang.
It wasn't long after that when Marie's mom texted me and said that they had settled on a firefighter theme for the shower. You see, my brother is a volunteer firefighter. He's been with the department since he was 15 years old, when he started off as an "explorer." He went to school and got a degree in fire science, even. So it's a big part of their lives.
This presented a little bit of a problem, though. The first instinct is probably always to do a fire truck cake. But... I've already done a fire truck cake before. (One that I loved and am still very proud of. In fact, more than two years later, that post still tops the list of the most popular posts on this blog.) I have this thing about not repeating cake projects that I've already done. I figure that if I spend that much time on something--most of my cakes of this magnitude take a full week to prepare--I'm not going to do the same thing twice!
I set out to Google for inspiration. At first I was going to do a traditional two-tiered cake and simply cut out little firefighting designs from fondant and paste them on. I saw fire helmet cakes as well, but I was intimidated by them because they all involved covering the cake in fondant. While I've made and worked with fondant to make details for a cake, I had never actually covered a cake in it.
But as the weeks went on and we got closer to the baby shower, I decided to go big or go home. To take the plunge. To challenge myself. To go where I'd never gone before.
All of that.
Thankfully, I'm pretty happy about where I ended up. :)
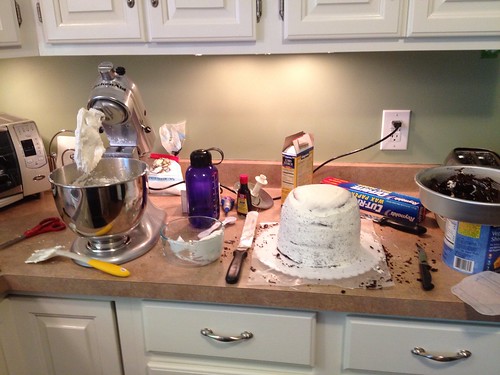
I managed to cover the cardboard that I used for the base without much issue, but when it came time to cover the actual cake in red--it was sort of a disaster. The fondant cracked in a bunch of places, but I was too far gone to remove it and start over, especially since there was now buttercream frosting on the back of it. I contemplated taking the fondant off completely and covering the whole thing with buttercream, but that would've meant that I would've wasted my time (several nights) making and coloring fondant that wouldn't be used. Plus, I'd have to make and dye buttercream red, which was just NOT an appealing option me.
I soldiered on without freaking out too much. I don't think I even dropped that many curse words, which says a lot. I Googled "how to fix cracked fondant" and tried a bunch of things. I whipped up a tiny batch of royal icing to use as spackle, but then I accidentally dyed it too burgundy. I still gave it a shot to patch some of my worst holes, but it was obvious because of the color change. Then, I whipped out some red candy melts and melted them, but the red was too pinkish. I added a little Americolor gel into it to darken it, but it seized up (whoops! lesson learned) and became very paste-like. Surprisingly, I had just accidentally created the perfect mixture to fill in my minor fondant cracks. I was able to spread the paste into the little cracks with my finger, and it covered them REALLY well.
For my large cracks/patches that were super obvious, I surveyed the situation and realized that I was lucky in that their placement made them very easy to cover up.
I had problems with the black edging around the cardboard base cracking as well, but I didn't sweat that as much. I smoothed it as best as I could with my fingers, and moved on with it! The funny thing was that the consistency of the red and black fondant ended up looking a lot like leather--which is something that someone pointed out to me at the shower. They were actually saying that because of this, it looked MORE authentic! Who knew?
Other than my problems working with the fondant, this cake was really not that bad. In other words, if I were to ever do it again (which isn't very likely due to my rule!), I would just buy store-bought fondant for the red and black and call it a day, because I'm sure it's much easier to work with.
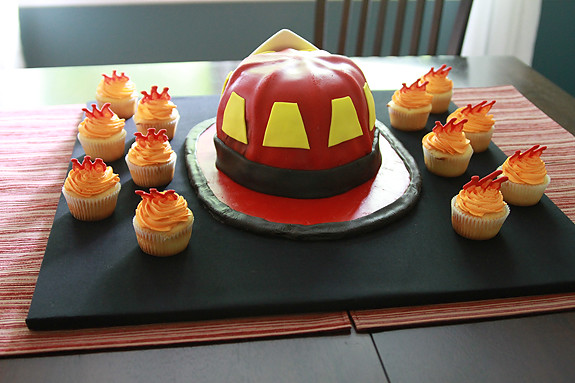
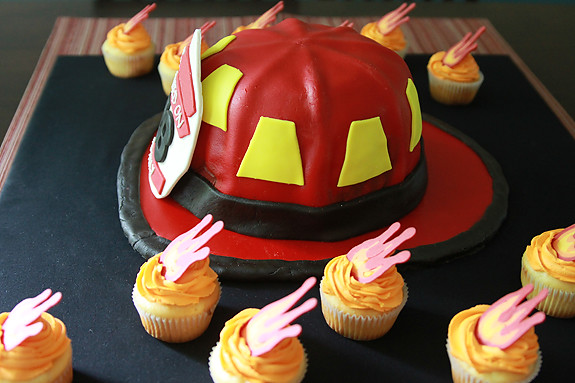
I used rolled fondant "worms" to make the ridges on top of the helmet, putting them into place prior to covering the whole thing with the red fondant. I traced one of the reflectors on the actual helmet and then cut them all using my traced image as a template. I "glued" them on with a little bit of water.
The base of the cake (the brim of the helmet) is made out of foam core that I covered in fondant.
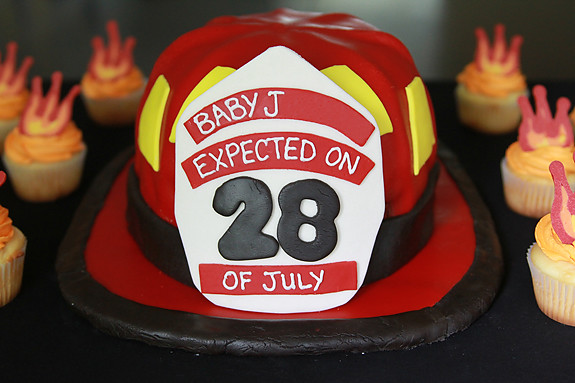
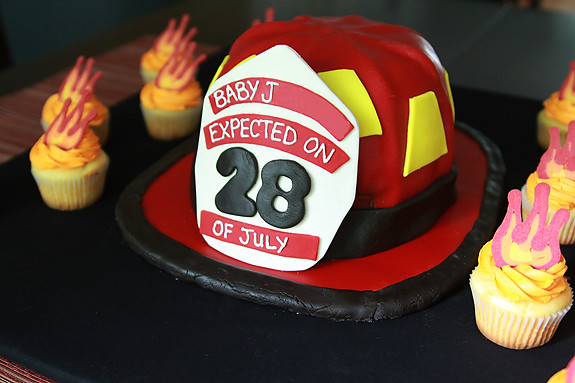
For the shield, I actually made a little bit of my fondant into gum paste so that it would harden faster and sturdier than fondant. I traced the shield on my sample helmet and then traced that shape onto the fondant and cut it out with a pizza cutter. I also traced and cut out the little strips of red. I stuck the red strips onto the white shield and then laid the shield on top of a stock pot resting on its side, so that it would dry in a curved shape.
For more information and detailed photos of these steps, check out this tutorial that I used as my guide for many elements of this cake.
WHEW. I think that covers everything.


9 comments:
one word: WOWOWOWOOWOWOWOWOWOWOOWWOWOWOOWOWOWOWOWOWOWWWWWOWOWOWOWWW!!!!!!!!!!!
You are too clever Heather!
So fun - you are amazing just to have untaken this task, and the result is amazing! You'll have to come back and post about how it was received - everyone will LOVE it!
This is downright amazing!!! You are so talented :) I could never attempt the cake but I'm intrigued with the candy melt cupcakes...thanks for sharing all of this!
It looks great! So do your white cabinets!
Amazing. That is all.
It looks great, Heather! We are our own worst critics. I make shaped cakes, too, so I know the stress!
Looks great to me.
Wow! That's an amazing cake!
Post a Comment