OK, not really a yard sale. It's a cloth diaper sale. And a small one at that.
Try as we might, we cannot fall in love with our One-Size Blueberry Deluxe Pocket Diapers. They've always been our least favorite in our stash, simply for the way they fit Nora. I wanted to love them, but Nora has a big buddha belly and relatively small thighs, so they typically ride down on her hips, creating big gaps at the legs. And gaps at the legs = leaks. Blah.
Sadly, we're giving up on them. But I know that for many people, Blueberry diapers are a favorite, so we're hoping that we can find them a good home. :) I'm actually sad to get rid of these, as they are some of my favorites in terms of the prints--so cute!
Here's what we've got for sale:
UPDATE 2/6/12 - EVERYTHING HAS BEEN SOLD. Thank you to everyone for the interest!
OS Blueberry Deluxe in Red (Snaps)SOLD
OS Blueberry Deluxe in Chocolate with Light Blue Polka Dots (Snaps)SOLD
OS Blueberry Deluxe in Pink Lemonade (Snaps)SOLD
OS Blueberry Deluxe in Cow Print (Snaps)SOLD
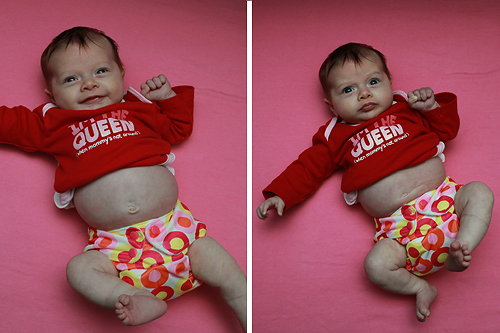
Here's Nora wearing the pink lemonade diaper when we first got it:
All diapers are in good used condition. These were probably used the least frequently out of all of our diapers, since they have never been our favorites. Elastic, PUL, snaps--all in good shape. We always hang our covers to dry instead of throwing them in the dryer. Smoke free home. Washed in Charlie's Soap.
Price is $14/diaper, including both inserts. Brand new, these retail for $23.95/diaper. They're the most expensive diapers we own! I'm disappointed they didn't work out for us.
Leave a comment with contact info, or e-mail me if you're interested (heatherdriveblog at yahoo dot com). I can take some pics to share if you'd like.
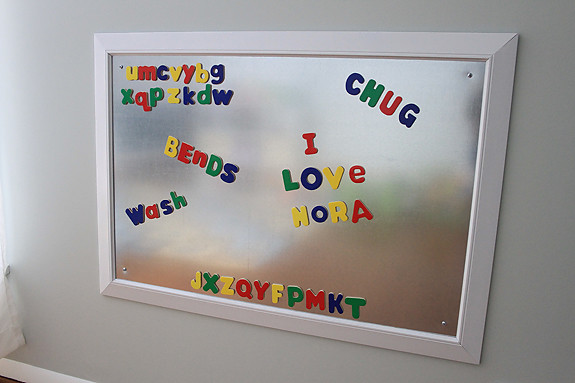
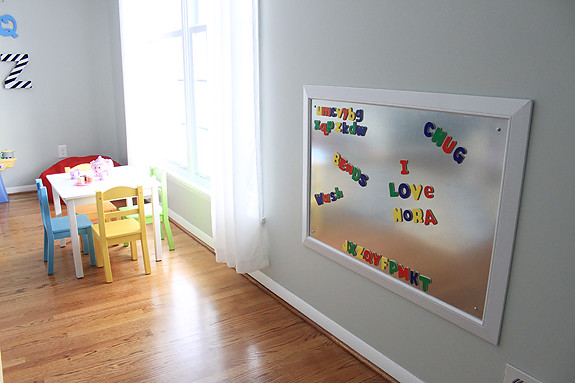
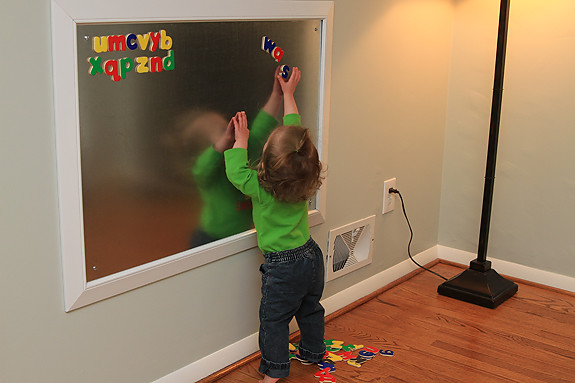
When we were putting the finishing touches on the playroom (after the alphabet wall), one of the things we decided to add was a magnet board at Nora's height. I was inspired by one made out of sheet metal that I saw on Pinterest.
Even after Googling, I could not find one that was made with any kind of existing frame, though! Most of the ones I saw required cutting trim pieces to size and gluing them onto the metal. Easy enough if you have experience cutting trim pieces on angles like that AND have a miter saw--neither of which we do. Also, a lot of the posts I was seeing talked about having to get the sheet metal from specialty suppliers.
But then I got a tip from a friend that the sheet metal was available at Home Depot. And when I went to check it out for myself, I discovered that it came in 24" x 36" size (for $20)--which is perfect, since that's a common frame size. Next, we went on the hunt for a good poster frame. Really cheap ones can be had for like $10, but I wanted the frame to be thicker than those. We ended up finding a good one at Walmart of all places, but there was one catch--it was brown!
Once we had it home, we removed the plexiglass from the frame and I spray painted it white--first with primer, then two coats of semi-gloss white spray paint. Perfect!
Yet there was still another small challenge to overcome. When we put the sheet metal in the frame, then put the backing back on and secured it with the tabs, we held the frame up to the wall and pushed on the metal part to see what would happen when we screwed it into the wall from the front. The metal pushed back against the wall, pulling away from the frame, leaving a big gap between the metal and frame.
Bummer.
We needed something to push the metal forward from the wall. The solution? A few pieces of foam core board. We cut a few pieces to size, fit them into the frame, put the backing of the frame back on, and sure enough--it worked out wonderfully.
Because the sheet metal and frame is pretty heavy, and it would be at Nora's level, we didn't want to hang our new magnet board from the hooks on the back of the frame. Instead, we decided to bolt it into the wall with a few screws, using drywall anchors. We estimated where we wanted the screws to be placed on the board, then made a little paper template to mark the place for the hole in each of the corners. Then, we used a metal drill bit to drill a hole through the sheet metal. We held the board up on the wall, made sure it was level, and then marked the holes with a pencil. Drilled, hammered in the anchors, and then hung the board up with the screws.
DONE!
And the thing is certainly not going anywhere anytime soon. It's definitely secure.
Nora loves it. The magnet board is a big win, and I love how it is something that can grow with her. Right now, she just likes moving the magnets around, taking them all off, putting them back on, etc. but as she gets older, she'll be able to start putting letter sounds and words together.
Oh! We got our letters (Melissa & Doug) at Michaels with a 40% off coupon. I really like that they are wooden, and the entire back of each letter is magnetic--there aren't any small magnet parts that can fall off. Eventually, I want to pick up some other types of magnets to give Nora some variety, but for now, the letters are good.
Cute, right? And despite the number of steps explained above, it's really quite an easy project. When we're cleaning up the playroom every night, I can't just put the stray letters back on the board. I always have to use them to spell as many completely random words as possible. Fun for the whole family, I guess. :)
It is a day that has been hanging over my family for quite some time now. One that I could not really grasp until today. And although it certainly seems more real now than ever before, I think that in a lot of ways, I am still processing.
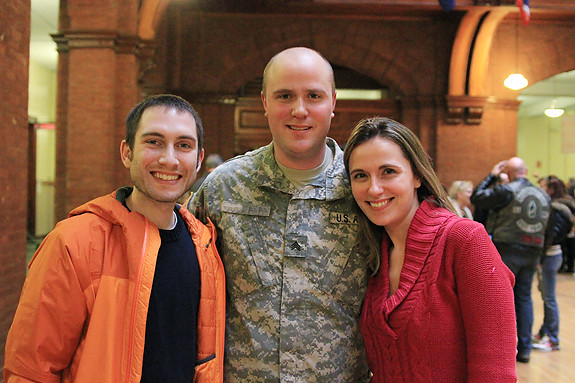
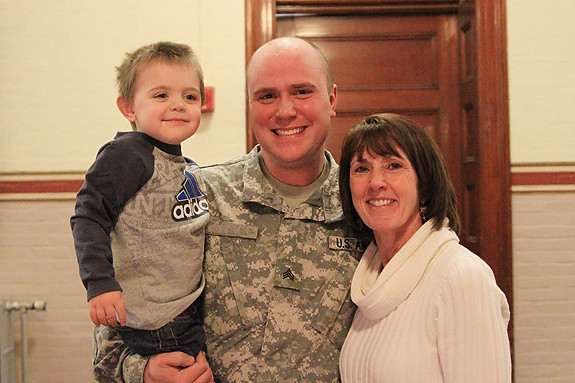
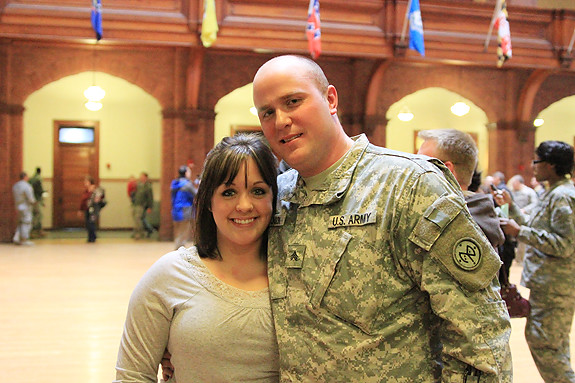
My brother, Trevor, will officially be deployed tomorrow morning.
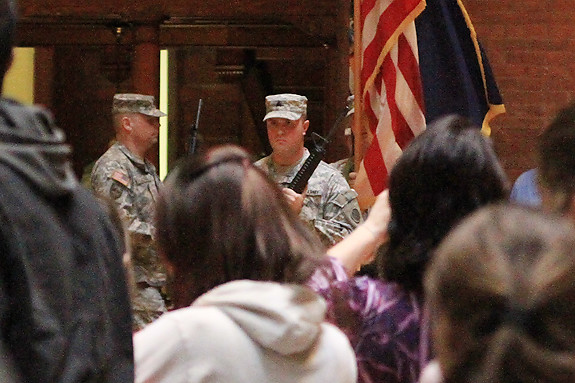
This afternoon, we attended the "yellow ribbon ceremony" to send off his unit.
He will be gone for a year. It's tough to comprehend. Thankfully, he'll remain in the States for a little while, fulfilling the beginning weeks of his deployment in the deep south. Then, we don't know what his destination will be. We have no idea where he's going; and neither does he.
I am sad. I am sad for the hole that will be left in our family until he returns safely home. I am sad that when we have family dinners, there will be a notable absence for a while. I am sad for the birthdays, the holidays, and other important events he will miss. I am sad that we will only get to joke, to laugh, to make fun of our mom (sorry, Mom!) in a long-distance way. (But I do have to give a shout-out for the miracle that is Facetime. Thank you, Steve Jobs.)
I am scared. At the ceremony today, there was a lot of emphasis on coming home safely. That's obviously numero uno, but for me, it's a fear I can delay a bit--because like I said, we don't even know where he's going. So it's actually hard to know if we should be scared. But I guess the fear right now is mainly focused in the unknown. So, we wait--just as he does--to find out what his assignment will be.
I am angry. I'm angry that there is even a need for soldiers. Anywhere. I wish that we could all just get along, sitting around a fire and singing kumbaya and all that shit. I'll go all beauty queen on you and say that I wish for world peace. An impossibility, I know, but hey. I'm just putting it out there.
I am proud. I am proud of Trevor. For the man he is, and for the sacrifices he is making for this country. It may be a "war" that I cannot understand, but it doesn't mean that I do not appreciate and recognize what the men and women in the military do for all of us. I love Trevor and love what he adds to our family. We fought a lot growing up--especially when we were teenagers, wow, there were some doozies--but we're grown-ups now.
That's how Trevor's deployment affects me. But the thing that gets to me the most--the thing that gives me a ball of anxiety in my gut--is not about me. It's about the little family he has made.
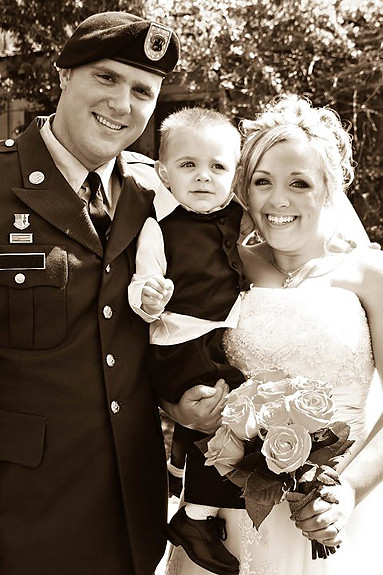
{Trevor and Kara's wedding day - May 21, 2011}
When I pray with Nora before putting her to bed each night, it is the three of them that I pray for. For safety, for peace, for strength. That the year may fly by for them so that they can all be together again before they know it.
As we sat at the ceremony today, you could hear the sounds of small children all around. Many of these kids were going to be saying goodbye to their daddies, or their mommies, for an entire year. And that's just... heartbreaking.
Sitting among all of these people, it really hit me: Kara, Hunter, and our family--we're not alone. There are hundreds of thousands of people throughout this country--and millions around the world--who are affected in this very same way.
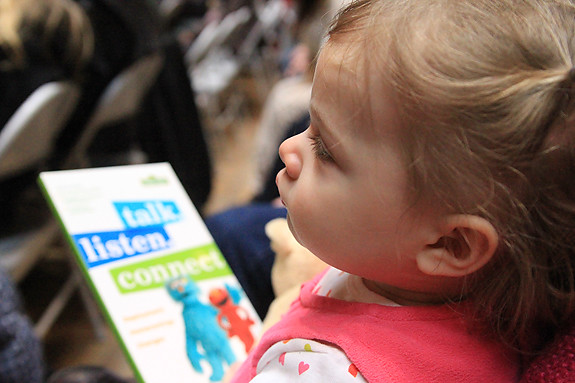
{Hunter, searching the group of soldiers for his daddy}
It is with great pride that we send Trevor off to serve with the U.S. Army National Guard.
But we will miss him.
And we'll be counting down the days until he's home.
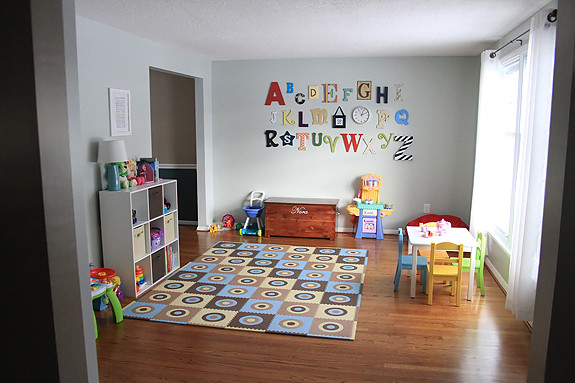
First, let me say thank you to all who left such kind comments on our playroom reveal post on Monday. It was so fun to finally be able to show you a little part of our house. Dare I say that it motivates me to finish other rooms just to be able to share those, too? :)
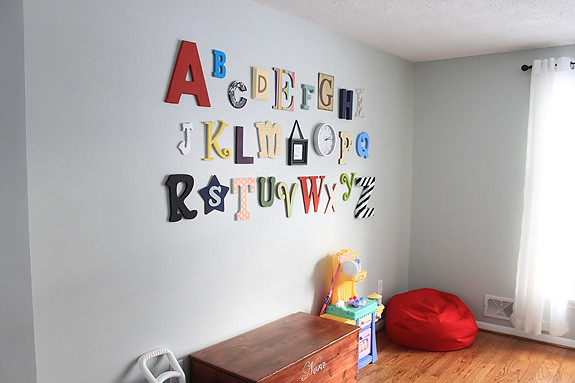
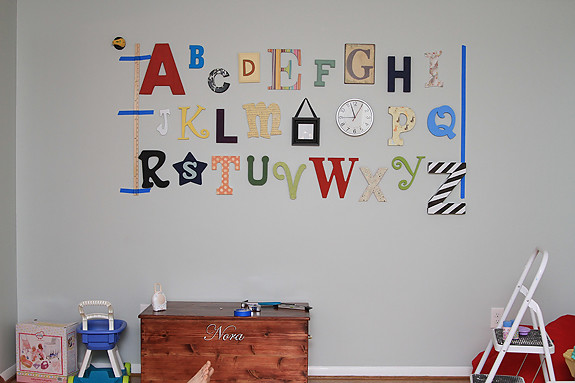
Anyway, I promised to follow up the playroom photos with some additional details about a few of the projects we completed for the room. The one that seems to garner the most interest from people--both online and in real life--is the alphabet wall.
Honestly, our ABC wall made the room for us. It's a pretty big wall, and before, it was a blank canvas, staring at us every time we were in there. Since it's a playroom without any real furniture, there was nothing against the wall to "anchor" the whole thing, so it was tough to figure out what we wanted to do with it. We considered some other art--prints, mostly--but all of it seemed too small. And a lot of the art I've spotted and liked (like this) is expensive.
I had pinned a few alphabet walls on Pinterest (like this and this), and I kept coming back to them as a solution for our giant wall. At one point, I showed Michael the photos, and he was sold. That, in turn, sold me.
I immediately began to seek letters. I wanted to find as large a variety as I could, and I knew from experience with other letter projects (Nora's name on her nursery wall, the D-A-D we did for Michael for Father's Day) that Michaels and Joann Fabrics only had a few varieties. But at some point, someone (maybe Niki?) suggested Hobby Lobby.
I don't even remember when Hobby Lobby opened locally, but there is only one here. It's relatively new, at least, and the crafty girl inside me is ashamed to admit that I had never been. Although it's not exactly FAR from where we live, it is somewhat of an inconvenience to get to, and Michaels and Joann's are closer--so I just never really had a reason to go to Hobby Lobby before. My search for letters led me over there, however, and I will say that as soon as I walked in the door, I was blown away.
Why hello, Hobby Lobby. Where have you been all of my life?
Love at first sight, people. And, as it turned out, for good reason--because I hit the freaking jackpot for letters at this store. Every time I thought that I had definitely found every variety they had, I stumbled upon another. That was the only complaint I had: their letters were scattered all over the store, not just in one easy-to-browse section. BUT let's just say that I was not exactly sad about having an excuse to scour every inch of the store.
After initially collecting something like 15 different letters at Hobby Lobby, we made separate trips to Michaels and Joann Fabrics to round out our alphabet collection. Over the course of a week or so, we collected everything we needed.
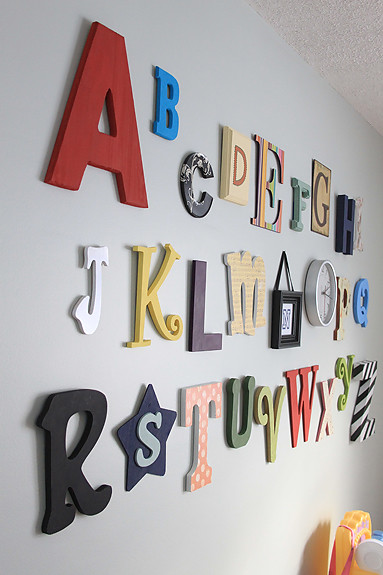
To decorate each letter, we also picked up a variety of acrylic paint colors (some I already had in my stash, others we picked out new), and some fun scrapbook papers. Then, we got to work. We spent several of Nora's naptimes and evenings decorating our letters. First, we laid them all out in order and I mapped out a plan to utilize a variety of patterns and colors. I made note of the color or scrapbook paper that we planned to use for each letter, and we did our best to envision what the finished product would look like (it was impossible).
Many of the letters were simply painted. With others, we painted the edges (or left them plain) and then I covered the front of the letter with scrapbook paper using Mod Podge. I used a foam brush to spread Mod Podge on the letter, placed it face-down on the back side of the scrapbook paper, and spread out any crinkles the best I could. Then, after letting it dry for several minutes, I used an exacto knife to trace the letter on the paper, cutting away the excess paper. Once I was done cutting, I covered the top of the paper (the front of it, the nice decorative side) with a layer of Mod Podge to seal everything and give it a nice protective finish.
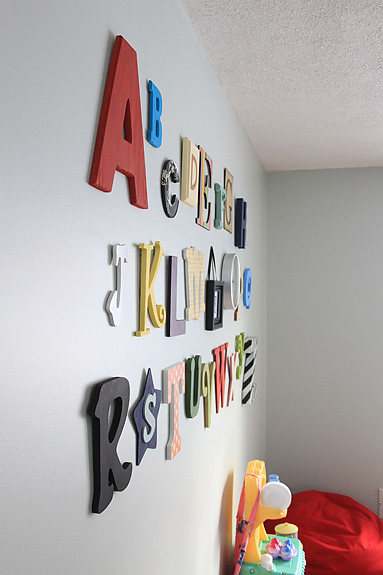
Some of the letters were super easy, because they were already complete when we bought them (such as the C, the G, the N--printed on our computer, the O--a clock!, and the R--left unpainted).
I actually spray painted the J and the Z. The J is just plain white semi-gloss spray paint, so that was simple. With the Z, I first spray painted it all white, let it dry for 24 hours, and then taped stripes on it with painter's tape. Then I used black semi-gloss paint to spray it again. Once dry, I peeled off the tape, and ta-da! Zebra print.
Once the letters were all finished, it was time to figure out how to hang them all. First, we laid them out in a "pattern" on the floor to determine how many letters to put in a row, how much space to put between them, etc. I took photos of our layout on my phone to reference as I did the hanging.
Then, we had to actually attach hanging hardware to each of the letters. You know, the little hooks that are on the back of picture frames? A lot of the letters didn't have those, so we had to add them. We bought a variety of picture hanging hardware at Hobby Lobby, and I used different ones, depending on a lot of factors--the thickness of the letter, the amount of space on the back, etc.
Finally, it was time to hang everything.
I wish it went that quickly in real life. :)
It actually really wasn't that bad, but I did do it over a period of about 3-4 days. As you can kinda-sorta see in the slideshow (and in the photo below), we utilized a laser level for the top row to make sure we were working on a straight line. We also taped a yard stick to the left side to mark the left edge, and used painter's tape to mark the right edge. The goal was to hang all of the letters, fairly evenly, and space them out to span the entire length between the yard stick and the painter's tape.
To hang each letter, we used a variety of methods--picture hanging hooks and finishing nails, mostly. Again, it depended on the letter, the type of hardware we had used on the back, and how much space there was between the hardware and the top of the letter.
And then our alphabet wall was finally DONE! So we stood back and admired it. Every day. We still do. :)
Time consuming, but worth it. And educational, too. We're working on teaching Nora each of the letters already. (Just kidding. Kind of.)
Don't forget to enter the giveaway for a monogrammed MINT cosmo bag from Penguin Personalization! It ends Friday, you know.
I just turned 30. Happily married. Mommy to the most beautiful little girl in the world (what, you're saying I could be biased?). Determined DIYer and homeowner. Sarcastic. A perfectionist. A bleeding-heart liberal. Frugal. Loves a little dog way more than many humans. Loves food, hates exercise (it's an ongoing battle). A loyal football fan. Loves to laugh. Values family and friends above all else. Vies to be a world traveler.
I started blogging in July 2007, shortly after becoming engaged. I chronicled my journey through wedding planning (and life, in general) on Road to the Aisle.







 Posts
Posts

