DIY Sheet Metal Magnet Board
Tuesday, January 31, 2012
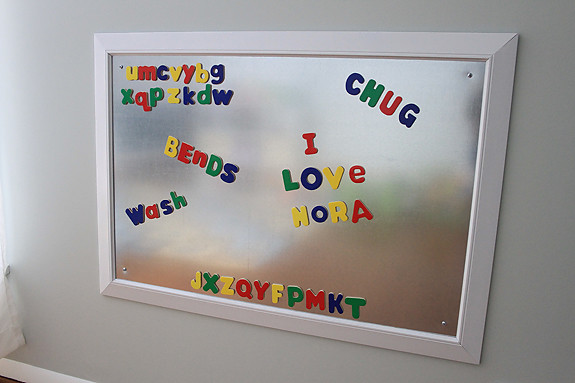
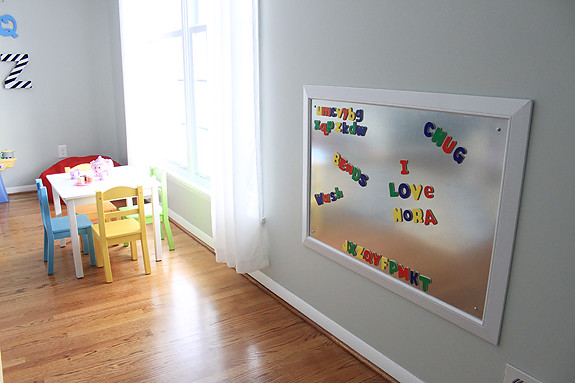
When we were putting the finishing touches on the playroom (after the alphabet wall), one of the things we decided to add was a magnet board at Nora's height. I was inspired by one made out of sheet metal that I saw on Pinterest.

Even after Googling, I could not find one that was made with any kind of existing frame, though! Most of the ones I saw required cutting trim pieces to size and gluing them onto the metal. Easy enough if you have experience cutting trim pieces on angles like that AND have a miter saw--neither of which we do. Also, a lot of the posts I was seeing talked about having to get the sheet metal from specialty suppliers.
But then I got a tip from a friend that the sheet metal was available at Home Depot. And when I went to check it out for myself, I discovered that it came in 24" x 36" size (for $20)--which is perfect, since that's a common frame size. Next, we went on the hunt for a good poster frame. Really cheap ones can be had for like $10, but I wanted the frame to be thicker than those. We ended up finding a good one at Walmart of all places, but there was one catch--it was brown!
Once we had it home, we removed the plexiglass from the frame and I spray painted it white--first with primer, then two coats of semi-gloss white spray paint. Perfect!
Yet there was still another small challenge to overcome. When we put the sheet metal in the frame, then put the backing back on and secured it with the tabs, we held the frame up to the wall and pushed on the metal part to see what would happen when we screwed it into the wall from the front. The metal pushed back against the wall, pulling away from the frame, leaving a big gap between the metal and frame.
Bummer.
We needed something to push the metal forward from the wall. The solution? A few pieces of foam core board. We cut a few pieces to size, fit them into the frame, put the backing of the frame back on, and sure enough--it worked out wonderfully.
Because the sheet metal and frame is pretty heavy, and it would be at Nora's level, we didn't want to hang our new magnet board from the hooks on the back of the frame. Instead, we decided to bolt it into the wall with a few screws, using drywall anchors. We estimated where we wanted the screws to be placed on the board, then made a little paper template to mark the place for the hole in each of the corners. Then, we used a metal drill bit to drill a hole through the sheet metal. We held the board up on the wall, made sure it was level, and then marked the holes with a pencil. Drilled, hammered in the anchors, and then hung the board up with the screws.
DONE!
And the thing is certainly not going anywhere anytime soon. It's definitely secure.

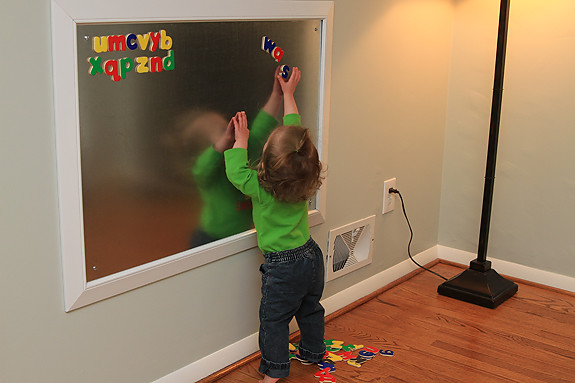
Nora loves it. The magnet board is a big win, and I love how it is something that can grow with her. Right now, she just likes moving the magnets around, taking them all off, putting them back on, etc. but as she gets older, she'll be able to start putting letter sounds and words together.
Oh! We got our letters (Melissa & Doug) at Michaels with a 40% off coupon. I really like that they are wooden, and the entire back of each letter is magnetic--there aren't any small magnet parts that can fall off. Eventually, I want to pick up some other types of magnets to give Nora some variety, but for now, the letters are good.
Cute, right? And despite the number of steps explained above, it's really quite an easy project. When we're cleaning up the playroom every night, I can't just put the stray letters back on the board. I always have to use them to spell as many completely random words as possible. Fun for the whole family, I guess. :)


5 comments:
i'm showing my husband this right now!! project time!!
I was googling images for "hanging nap bed pinterest" (random, yes but I couldn't find a pin I wanted) and on down on page 4 there's a picture of a baby. Nora! I immediately recognized her & wondered what she was doing on the hanging nap bed search! :)
I am in love with your playroom! Great job! It appears that all of your hard work has truly paid off. You must be thrilled watching Nora play in there.
Such a great idea! And I love the picture of her on her tippy toes trying to reach the letters!
This is such a wonderful idea!!!
Post a Comment